
TAL Oversized Shirt(dress)
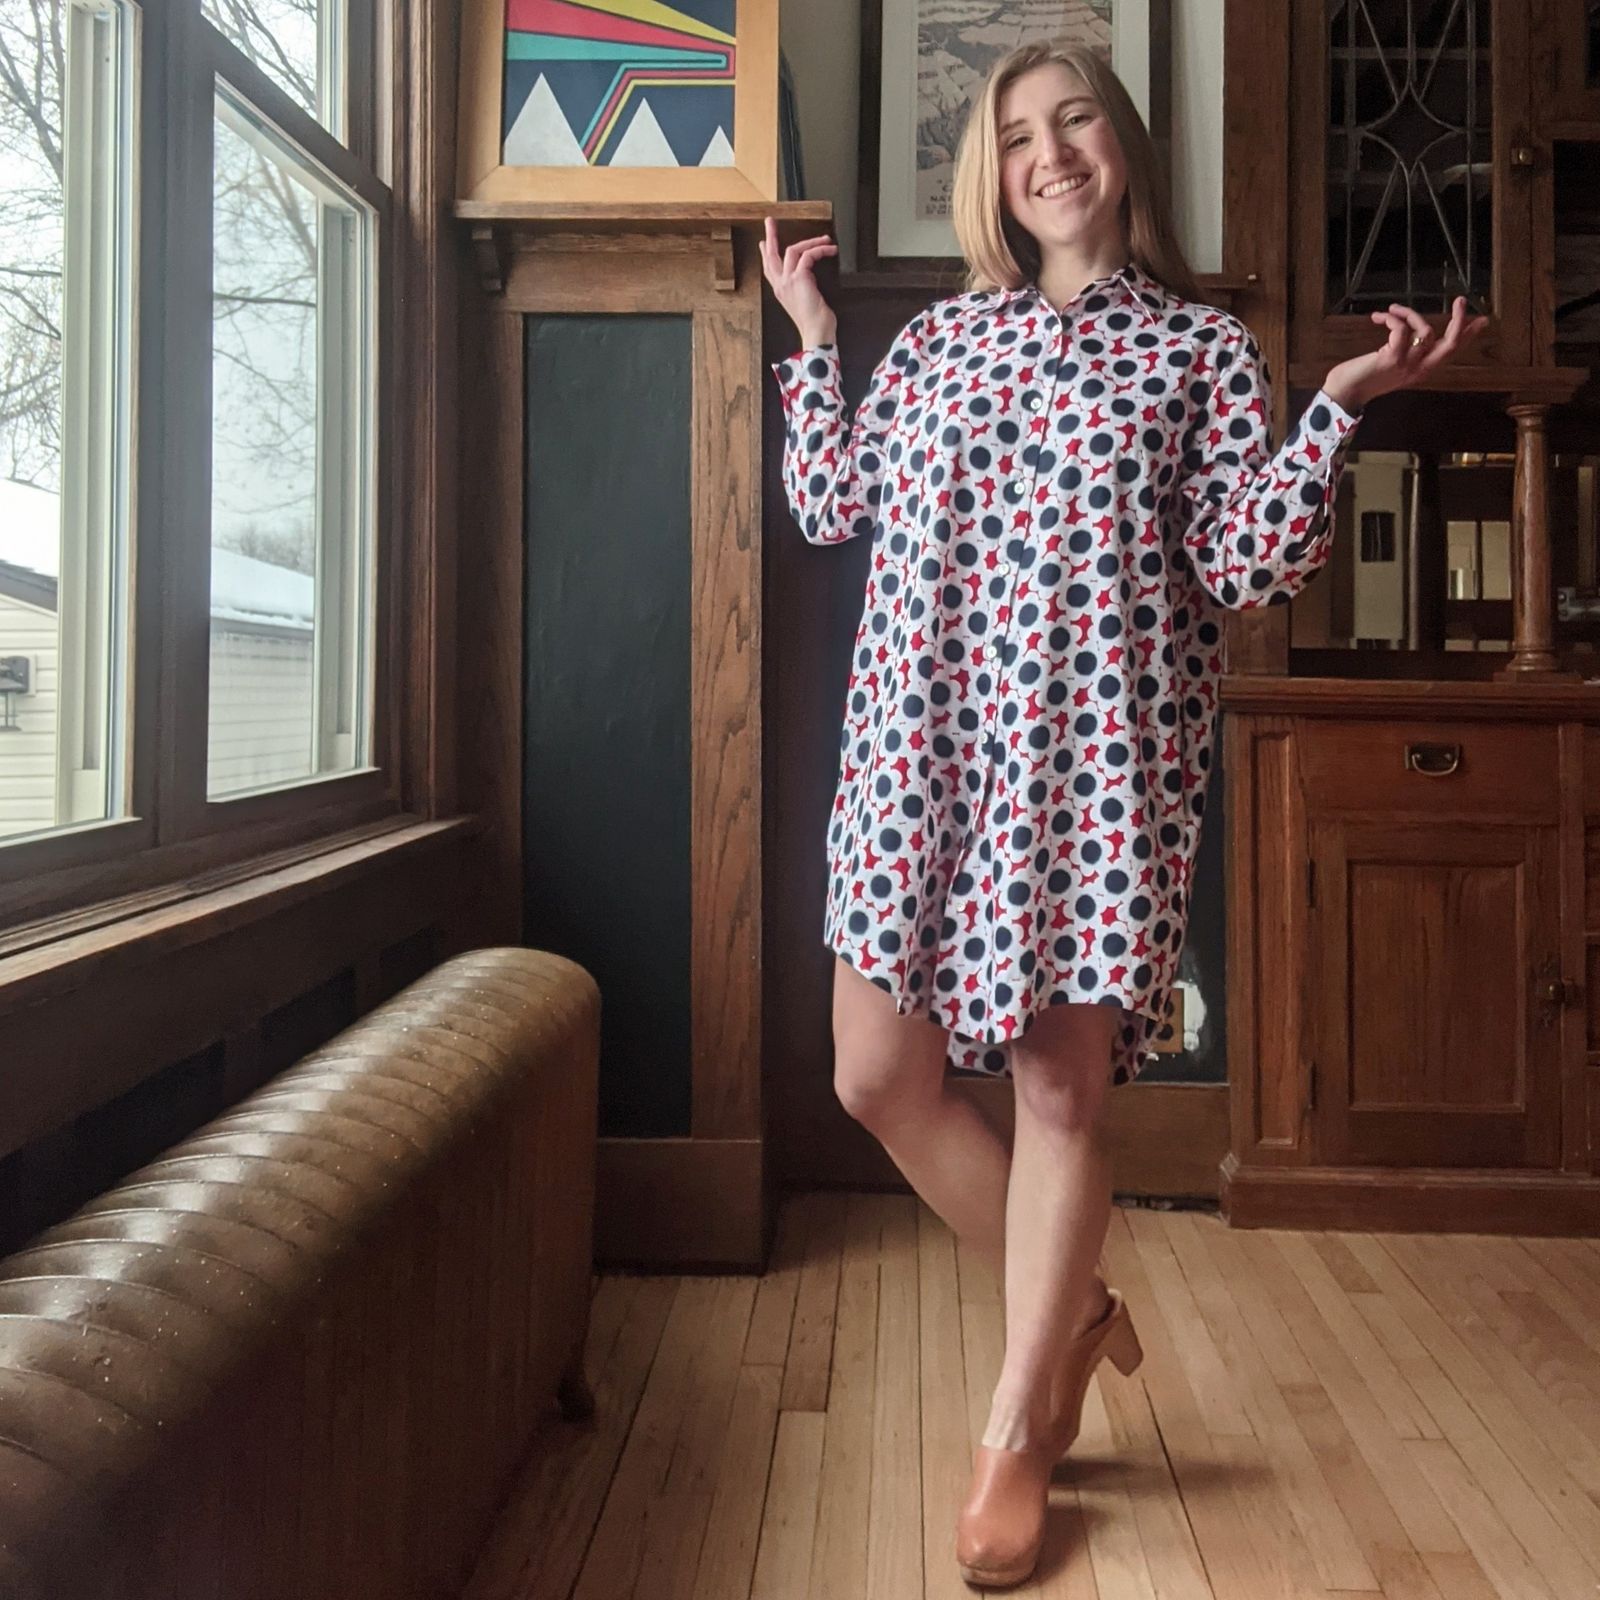
Successfully resisted pairing this pattern with white shirting (for now) because HELLO and welcome to this gorgeous bold flower print!!!
I am VERY picky about prints — scale, repeat, interaction of color, and art quality are intensely scrutinized so it's exciting to find a print that meets standards.
Recently I've been finishing shirts with lots of hand stitching (cuffs, collar stand, sleeve plackets and hems). It doesn't take that long and is honestly a lot less frustrating than inevitably missing the backside of the fabric when stitching in the ditch. And it looks so much nicer. I'm debating handstitching down the button plackets and ripping out the navy topstitching there as well.
Trying out long shirt over jeans styling could be fun with this too! (A direct steal of my cool aunt-in-law, Jenny's signature look)

Also wearing Ash Jeans and a Nikko Top
Pattern
Got my paper copy from Lakes Makerie
Size
My measurements: 34"B / 26"W / 36"H
Made an XS bust graded out to a S under the armpit.
A 34" bust is technically a "Small" but I decided to size down based on finished measurements.
Next time I could either leave the grade-out as-is, or make a straight XS.
Fabric
Somewhat sateen, cotton shirting
Deadstock, unnamed designer/source
Fit Adjustments
None other than the grading out, which probably wasn't necessary, but I wasn't muslining so prefered to have more room around the hips. Next time might make a straight XS.
I didn't expect this to fit perfectly, but was willing to just go with it for my first one as it's supposed to be oversized anyway — the risk of it being unwearable was low.
The shoulders are pretty far off my actual shoulder — about 1.5". The designer samples show the shoulder of the garment as wider than the wearer's shoulder but I could probably do with a 1" narrow shoulder adjustment in the future.
The sleeve length was good with no shortening! (Surprisingly) Could maybe shorten by 1/2" next time as I like my hands to be unencumbered but it wouldn't be necessary.
Added some length at the bottom in hopes I could wear it alone as a dress. After constructing, I ended up cutting the extra length off and using it as a facing to finish the hem instead. My finished length is only about 1.5" longer than as-drafted!
Notes about The Assembly Line patterns
I've made two Assembly Line patterns now, back to back. I don't love their instructions. They aren't always clear and I often chose a different construction method than they described or ignored the instructions altogether. I don't think the instructions would completely steer a beginner wrong — that is to say, if you completely follow the instructions you will have a shirt at the end — but I would not necessarily recommend their patterns as a "first" (first button up, first collar, first side slit, first mitered hem, first sleeve placket etc.)
However, there are some aspects of the instructions that are very thorough and would be great for beginners! They start the instruction booklet with some great how-tos on basic sewing techniques and have some good button placement diagrams.
Included seam allowance is 1cm (~3/8"). Weird but easy to change.
The line drawing for this pattern is not 100% accurate. The front view shows what looks like a front yoke piece that adds a style line on the shoulder — in reality that's the back yoke showing on the front. In photos it is pretty clear that there is just the normal back yoke and it doesn't show on the front like that, so it's weird to me that they'd show it on the front in the drawing.
The one part of the instructions for this shirt I found truly shocking was for the sleeve placket. To be fair I have not tried this method, and it does appear in some trustworthy old sewing books I have. But honestly, why. This looks like a nightmare. Simply cutting the placket open and folding the edges over and stitching down?! My machine is dreaming of all the fabric it will get to eat. The Assembly Line seems to have positioned themselves as a friend to the beginner sewist, but I would not recommend this method to a beginner. It sounds simple and easy (No extra placket pattern pieces! No precise trimming! No confusing flipping to the wrong side and right side!) but I think in the end it wouldn't produce as clean of a result for a less experienced maker and doesn't facilitate good habits. The examples I have seen say this method is sometimes used by designers, which I can understand if perhaps they want less bulk and are handsewing to ensure nice finish. I "drafted" a rectangle a couple inches larger than the placket area in both dimensions and did a facing which I handstitched down on the inside for a clean and invisible-ish finish.
I do like their paper pattern packaging. It is a larger size envelope (letter sized/9"x12" ish) and the pattern is printed on paper that is more "computer paper weight" (24lb copy) and not tissue. This makes it easier to fold back up and fit in the envelope when you're done.
Even though I have some gripes with what could generally be considered "over-simplification" in their patterns, I've found that overall they have a pretty low number of pattern pieces and are therefore quick to trace off (for members of team trace) and quick to cut out of fabric. The button bands are grown-on, there isn't a chest pocket, cuffs are one piece and folded, etc.
The pattern pieces don't include notes on what to cut out of interfacing, so be sure to check out the instructions for that while you're cutting out. To be honest I skipped all interfacing on this shirt and it turned out. Sometimes even lightweight interfacing makes garments too stiff for my liking. Plus it's a chore.
Lastly, I think the pattern piece for the inseam pocket says to "cut 2" — but you will need to cut 4 to make 2 pairs. If you've done inseam pockets before that will probably be obvious.
All this to say, it might seem like I hate TAL patterns. I definitely do not and would like to make more versions of the two patterns I've made thus far (Kaftan and Oversized Shirt). I think their patterns are thoughtfully designed and drafted overall and I enjoy sewing and wearing them!