
Liberty Party Blouse!
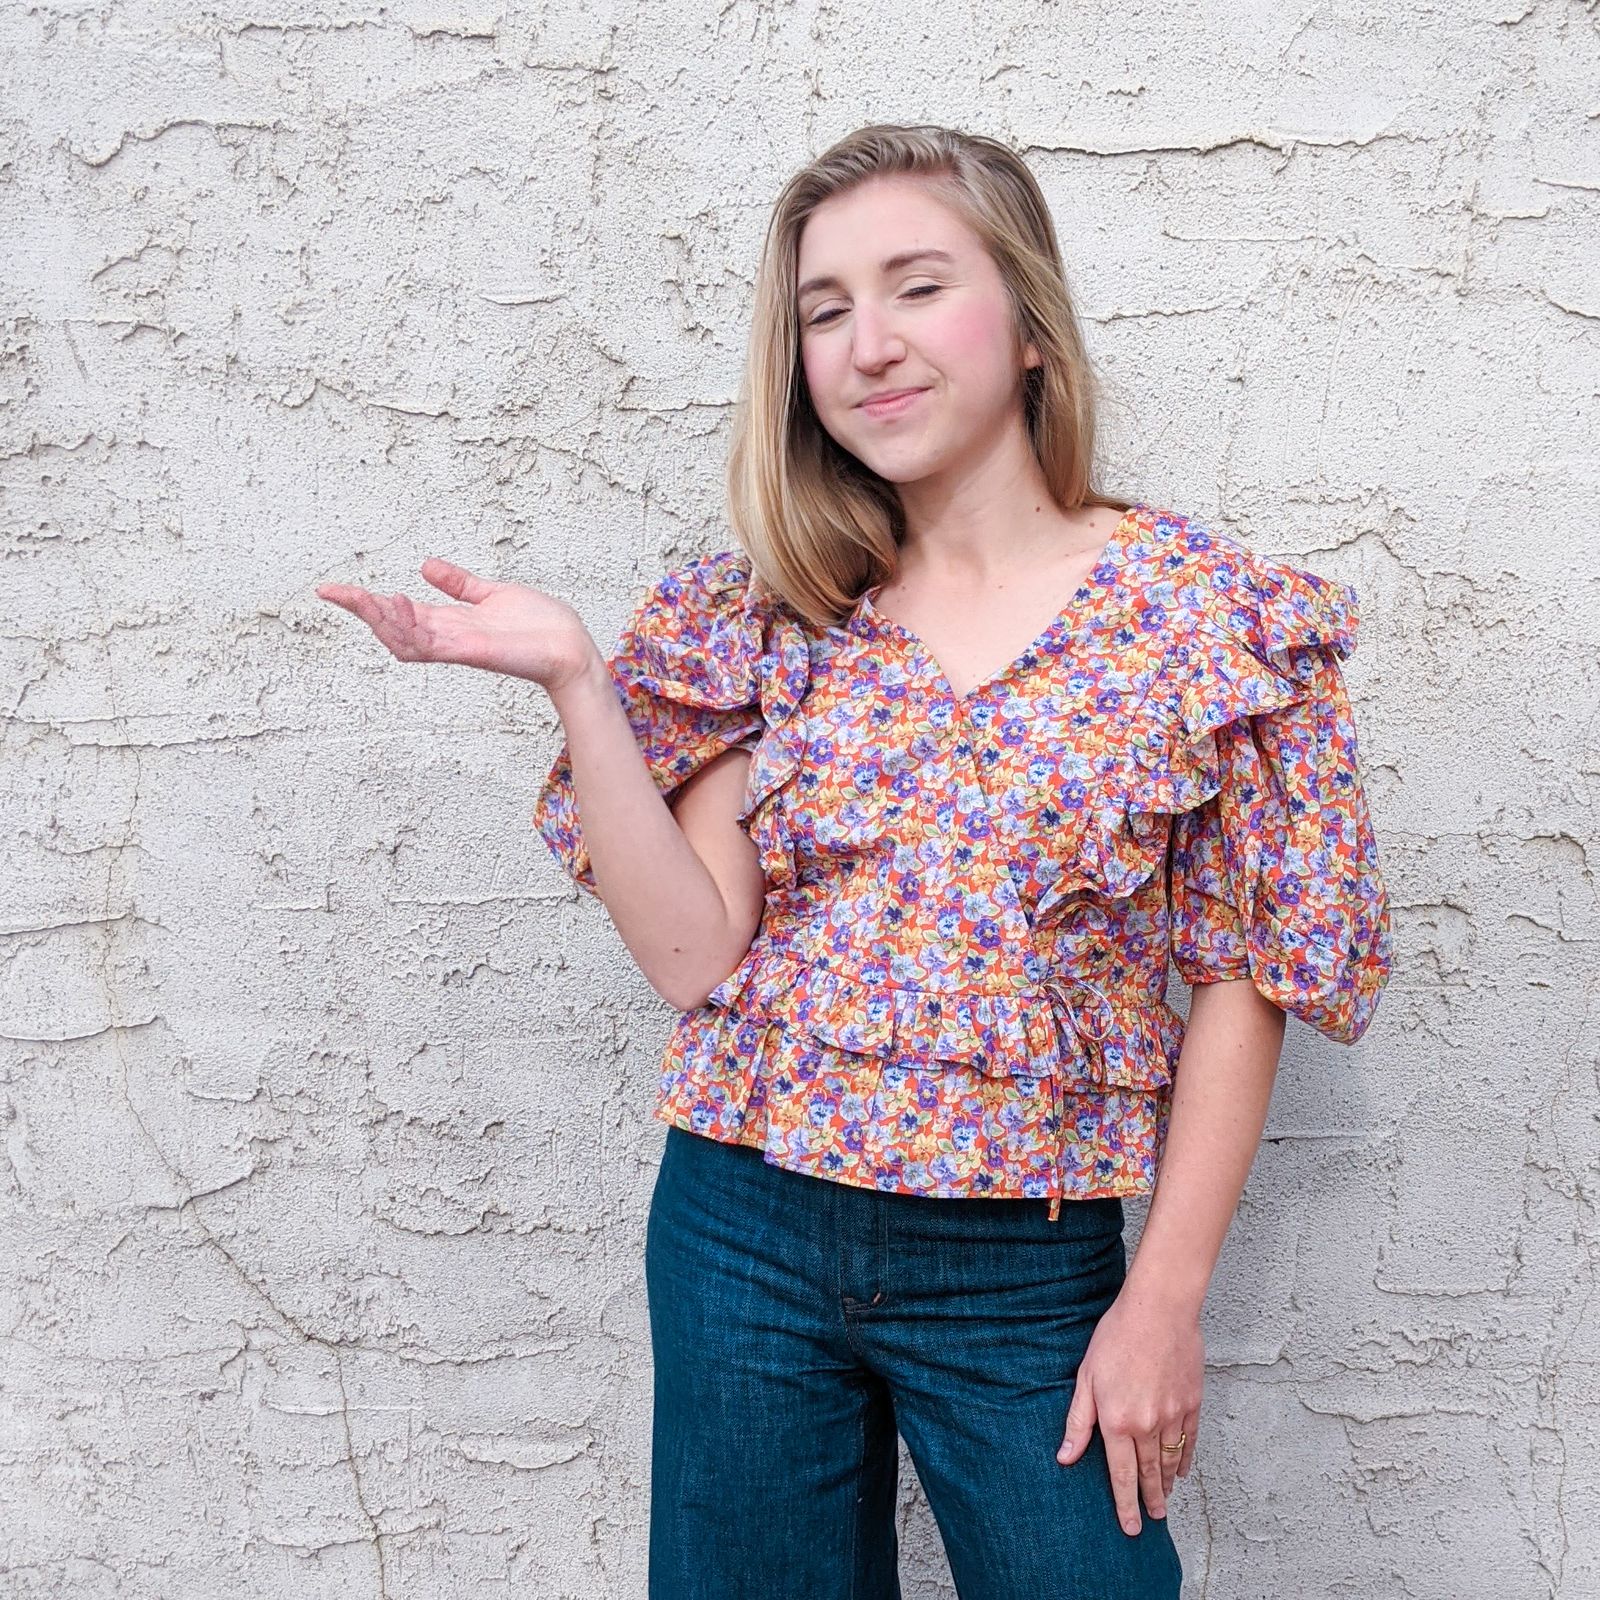

To quote my sister: "That is A Shirt!"
INSPIRATION
This fun Rhode Blouse! This print is not terribly different from mine, but it's been made in many different prints/colors. Photos of solid versions were more helpful for studying style lines.

I nearly called this an "easy" hack — but that's not exactly true. It is easy in that none of the adjustments are difficult on their own, but there is quite a bit of work involved. Wanted to share my process to make it easier anyone who might also want to recreate this fun top!
PATTERN
Decided to start with the BHL Hannah. It’s a wrap top with some shaping and simple finishes that mean the pattern pieces are straightforward and easy to work with. It already has a waist seam in approximately the right place.
I should say that right after I finished, the Flor Dress by Bella Loves Patterns was released which is a lot closer to this than BHL Hannah. Oh well.
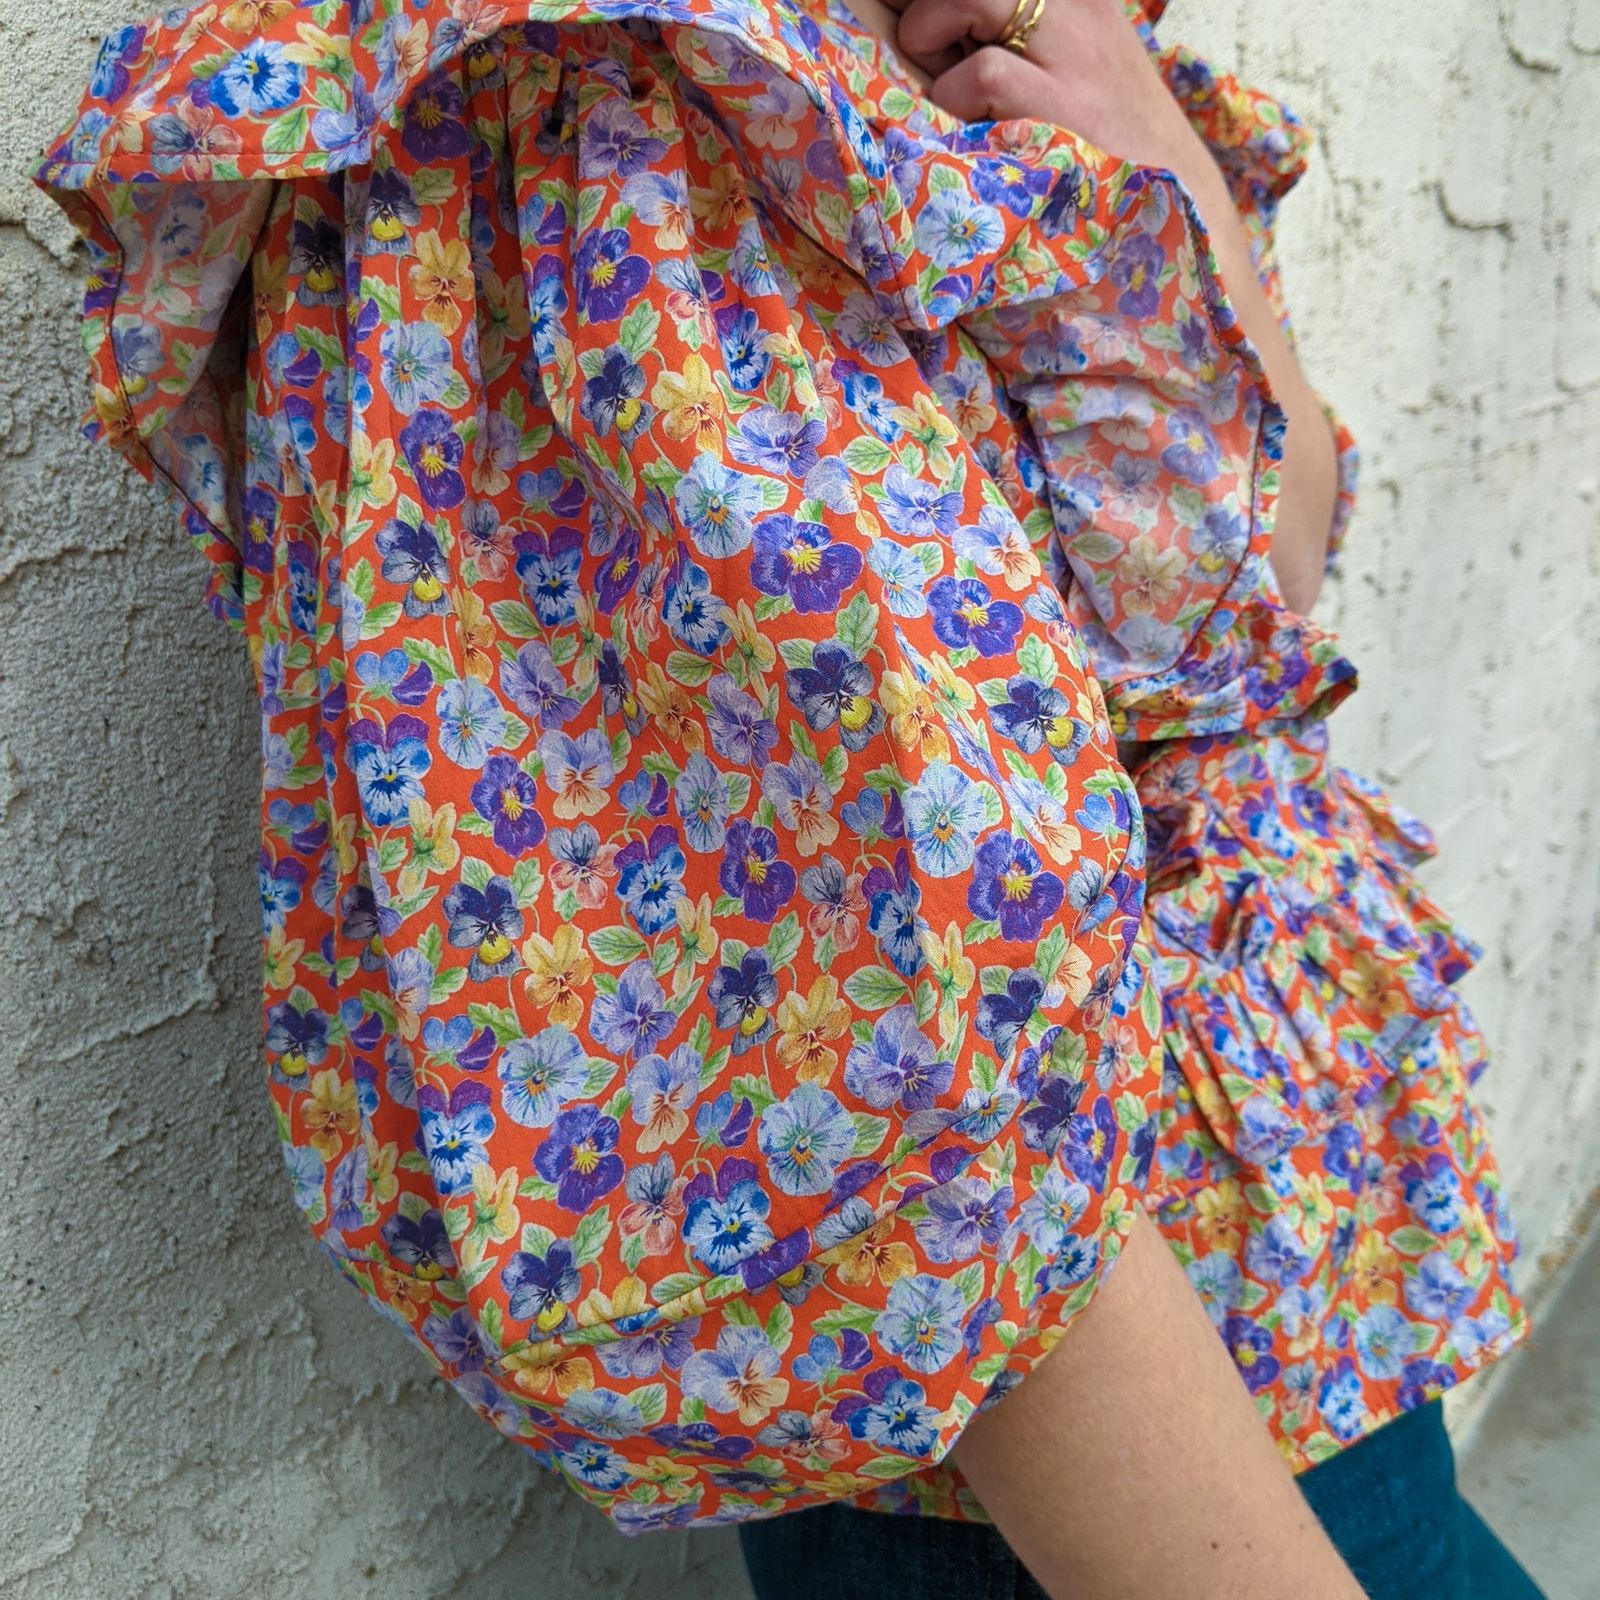
FABRIC
Liberty Lawn! The orange ground is what sold me.
I had 2 meters and used nearly every single square inch. After cutting out all my pieces I made bias tape from the scraps which I used for some finishing inside.
SIZE
In the BHL Hannah size chart, my measurements correspond to:
6/10 Bust
4/8 Waist
6/10 Hips
Started with straight size 6/10. I want the bodice to have a more relaxed fit than the pattern is designed to have so extra ease in the waist would be ok!
FIT ADJUSTMENTS
Moved side dart down by 3/4"
Shortened bodice at the L/S line by 3/4"
STYLE ADJUSTMENTS
These adjustments are covered in more depth below, but here's a general overview:
- Narrow Wrap Front (so the wrap doesn’t go quite so far around the body)
- Widen shoulder so neckline sits closer to neck
- Raise neckline for a little more coverage
- Split front into a princess seamed bodice
- Split back into panels
- Draft ruffles for the princess seams
- Draft long and short ruffles for the waistline
- Draft/Hack giant poufy lantern sleeve
Before you start messing with the pattern: draw in your seamlines! On all the pattern pieces. It's a quick and easy way to set yourself up for alterations success. Anytime marking/measuring is referenced here it's to the seamline (SL).
There's a lot here — if you have any questions after reading, let me know!
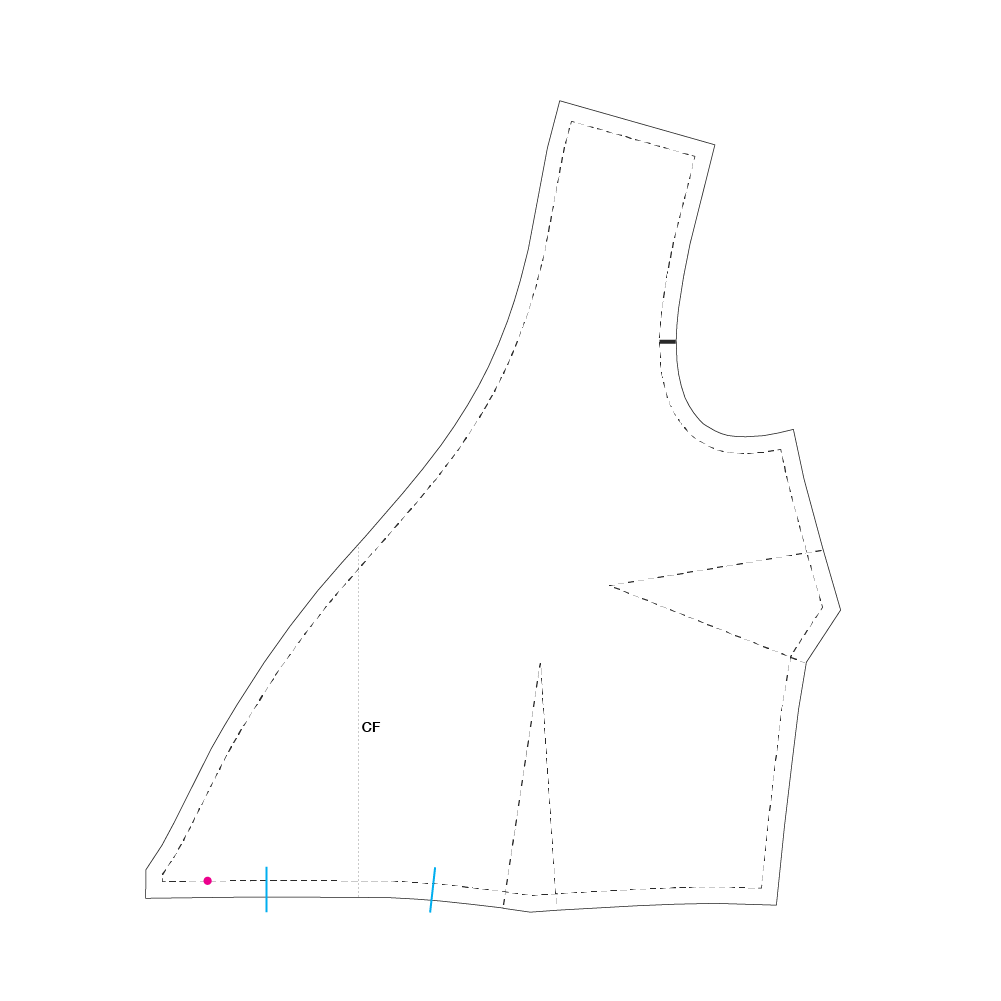
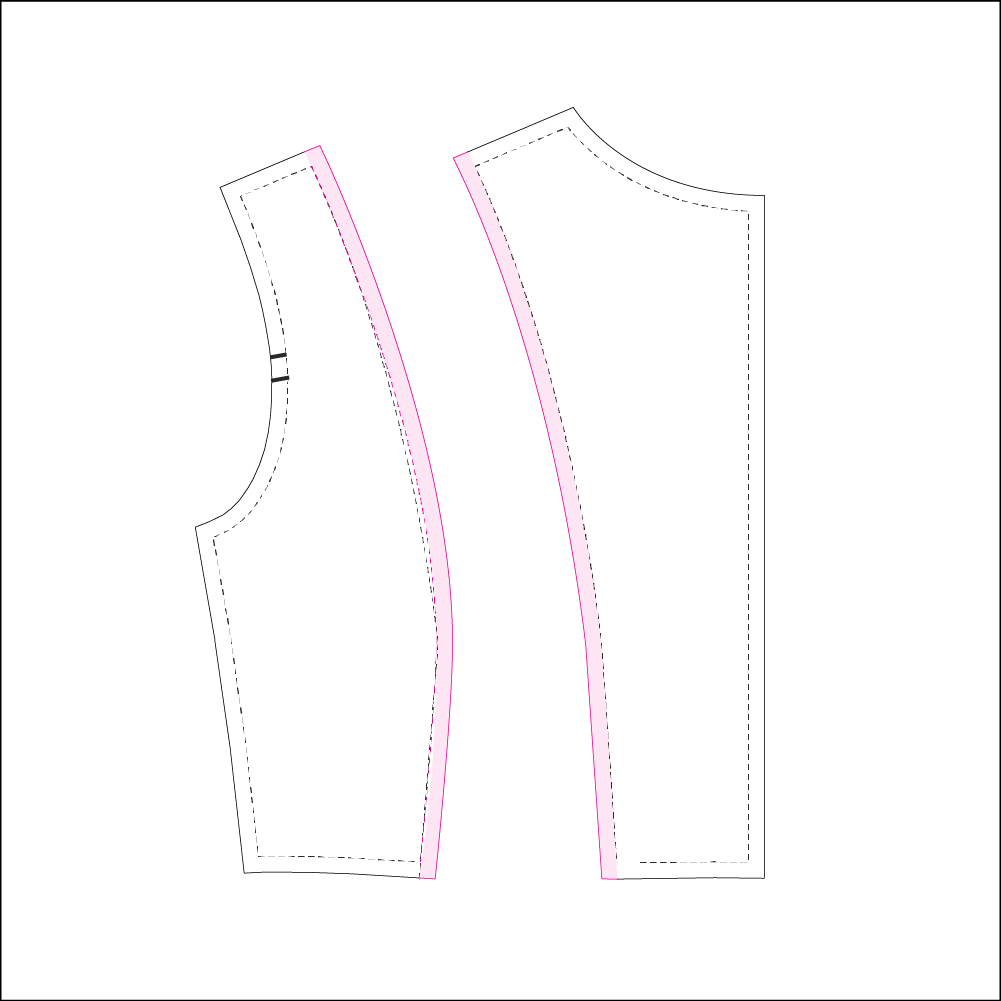
FRONT BODICE
Narrow Wrap Front
Mark a point on the waist seam that is equidistant from the CF notch as the CF notch is from the nearest dart leg. (Fold your pattern piece at the CF or measure)
This is your new Bodice Edge Point
Widen Shoulder
Extend the shoulder line toward the neck your desired amount. I did 1.5"
Mark the new shoulder end point.
Draw New Neckline
Draw new seamline and cut line from new extended shoulder point to new Bodice Edge Point. I raised the neckline and smoothed out the curve.
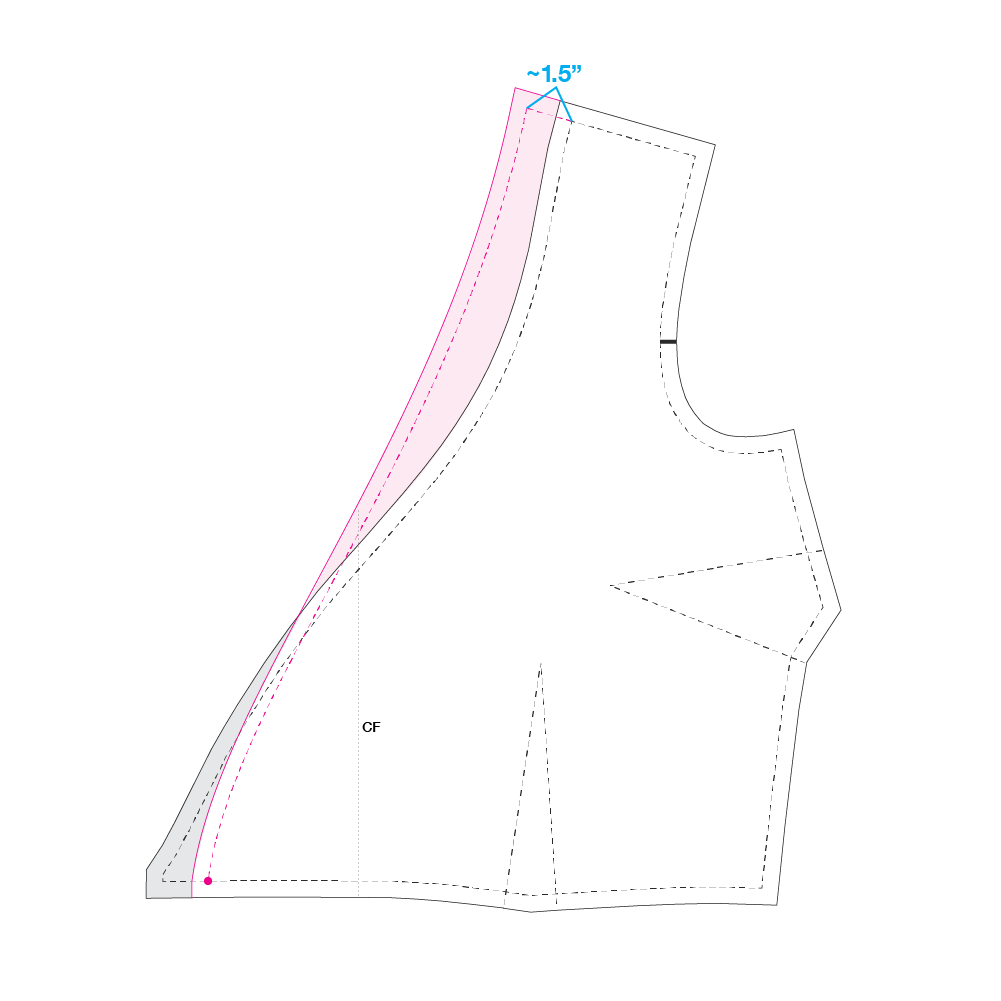
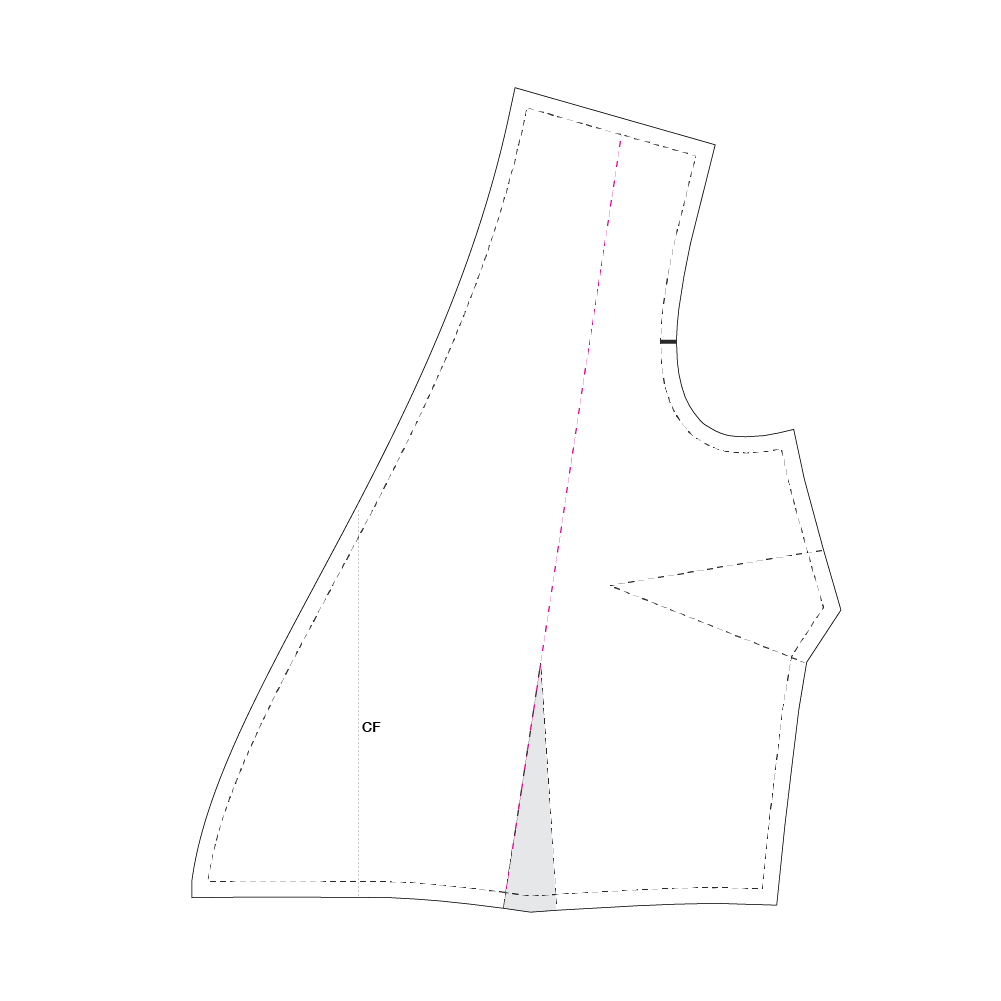
Split Front Bodice into Princess Seams
- Draw a line extending from the leg of the dart nearest the CF to the shoulder.
- Cut the front bodice apart along this line
- If you want a closer fitting waist (what I did):Cut away the area meant to be sewn in the dart by cutting along both dart legs.
- If you want a looser fitting waist:Leave the dart fabric in the pattern piece. Only cut along the dart leg closest to CF.
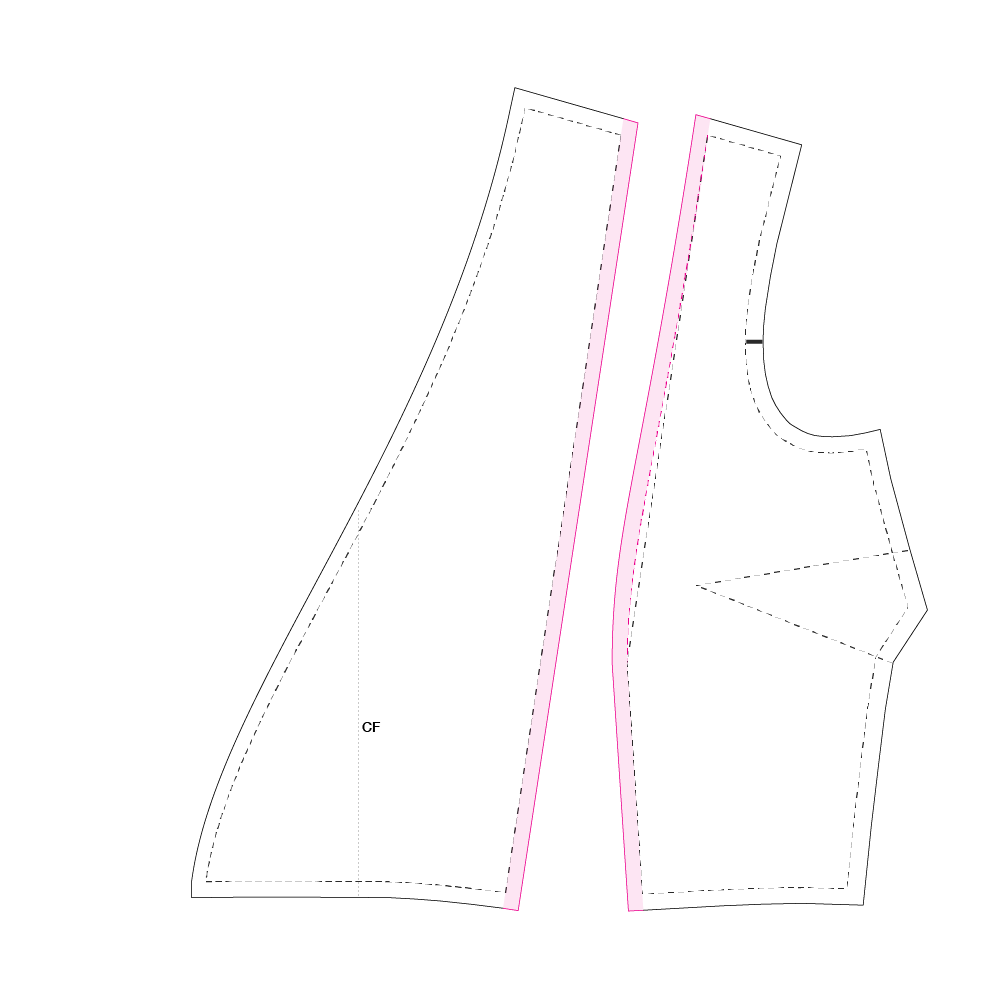
- Smooth the curve if necessary.
- Add seam allowance.
BACK BODICE
Extend Shoulder
- Extend back shoulder toward neck the same amount as front.
- Redraw back neckline.

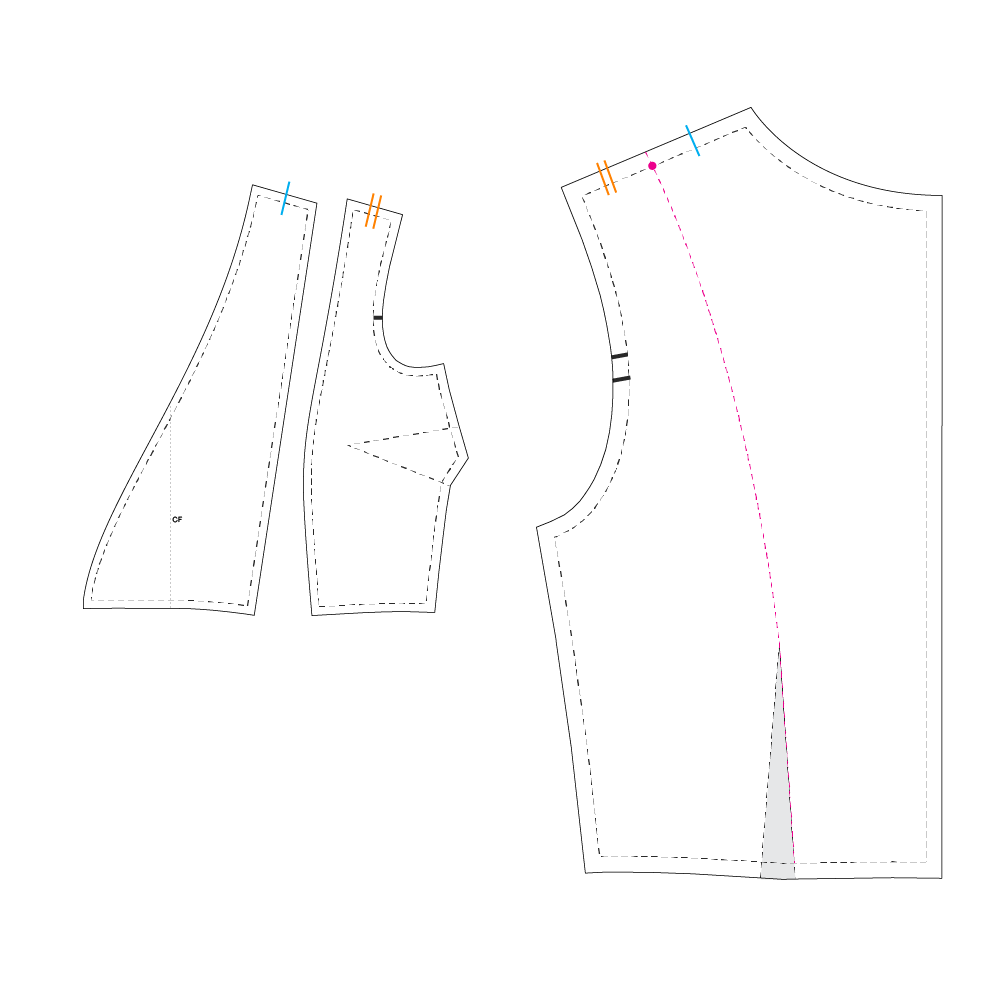
Split Back Bodice into Panels
- Measure location of princess seam on front bodice shoulder.
- Mark same location on back shoulder so seams line up.
- Draw a line extending from dart tip to shoulder point.
- Cut along this line to create panels. (Same as on front bodice, cut dart fabric out for closer fit, leave all or some in for a looser fit. I left the dart fabric in for a looser fit through the back but might remove it next time.)
- Smooth edges if necessary.
- Add seam allowance between panels.
DRAFT RUFFLES
Shoulder Ruffles
Make 1 pattern piece (cut 4)
- Length: 2x the front princess seam length. (The back length was slightly different but close enough for my purposes and having just one bodice ruffle piece simplifies things
- Width at the top is equal (or greater than if desired) to the shoulder length of the center princess seam panel
- Width at the bottom is your desired amount. I think mine was ~1.5"
- Draw a nicely curved edge from top to bottom along one side, a straight edge on the other.
Add seam/hem allowances to all edges.
Waist Ruffles — Long
Make 2 pattern pieces
- Rectangle for back bodice (Cut 1) : 1.5x the total length of the back waist seam X desired length (I did 5", would maybe go a touch longer next time)
- Rectangle for the front bodice (Cut 2): 1.5x the total length of the front waist seam X desired length
Add seam allowances to all edges.
Waist Ruffles — Short
Make 3 pattern pieces
- Rectangle for back bodice (Cut 1): 2x total length of back waist seam x desired length (2.5" for me)
- Rectangle for front bodice that crosses over (Cut 1): 2x total length of front waist seam x desired length
- Rectangle for front bodice that crosses under (Cut 1): 2x length of side princess seam panel ONLY x desired length. (this one is shorter since you don't need extra ruffly bulk under your cross front.)
Add seam allowances to all edges.
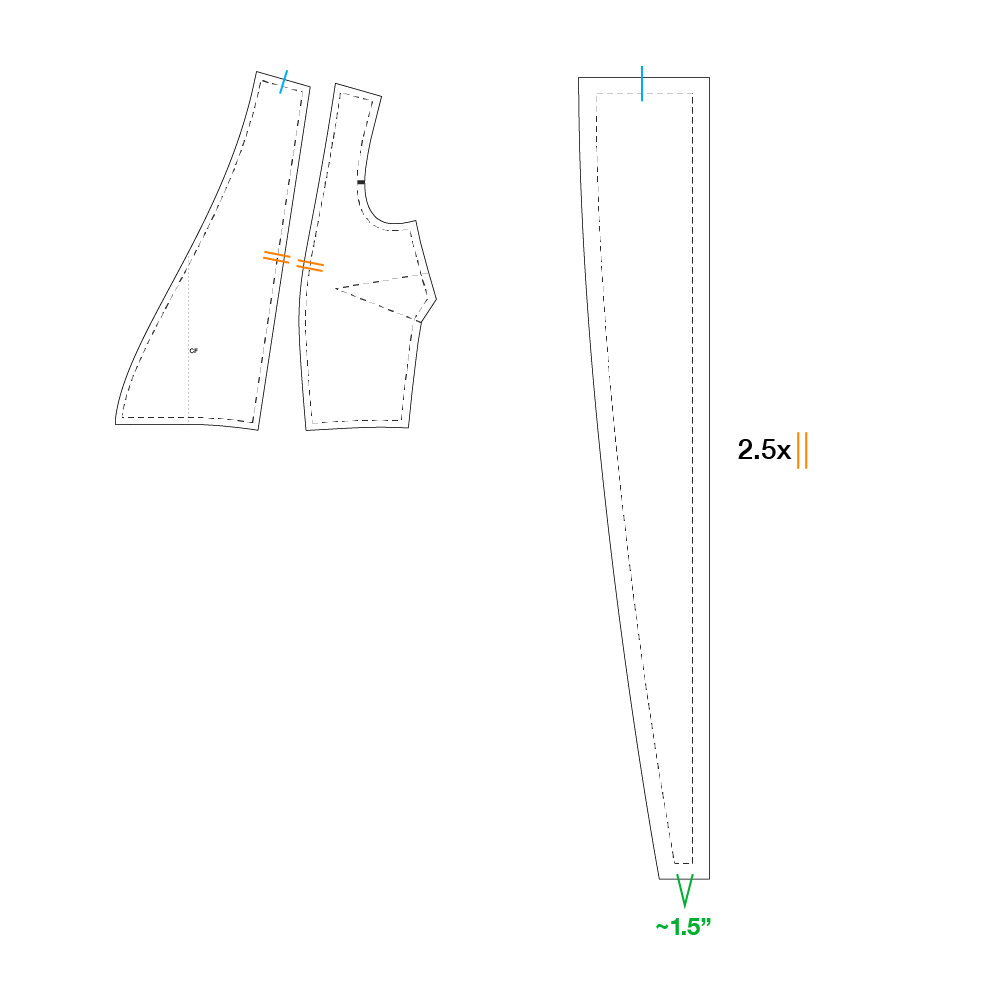
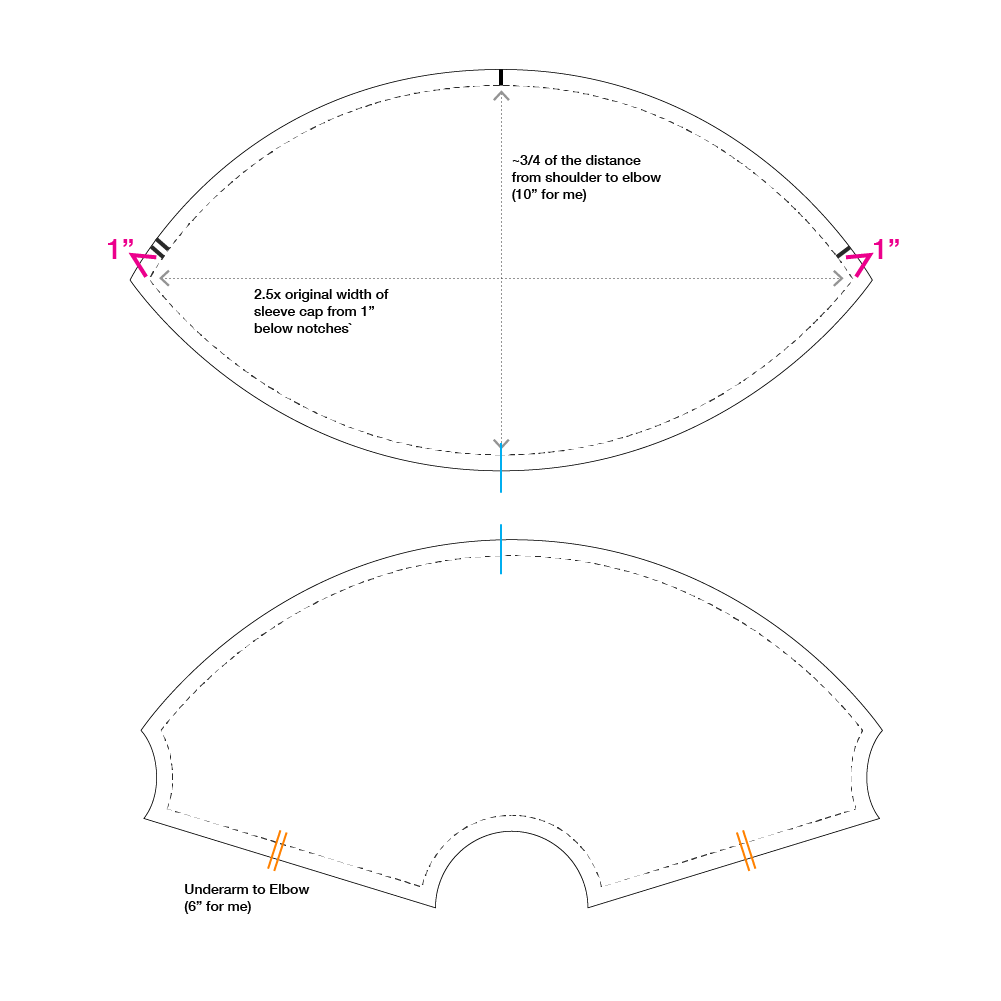
SLEEVE
The original sleeve has some unique style lines that I wanted to imitate as best I could.
The sleeve is in two pieces: a gathered cap upper sleeve, and a lower sleeve that tapers to a slim elbow opening (I'd call it a modified lantern) . Together they create a cowl-sleeve look—the upper sleeve has some extra length/width that pools over the lower sleeve. The lower sleeve includes the un-gathered portion of the armscye (below the notches). T
I started with the short sleeve pattern piece provided for the Hannah Wrap, but honestly probably could have started from scratch. I'm just going to show approximately what my final pieces looked like and the important measurements.
I gathered the cap between the front and back notches, and finished the cuff with bias binding.
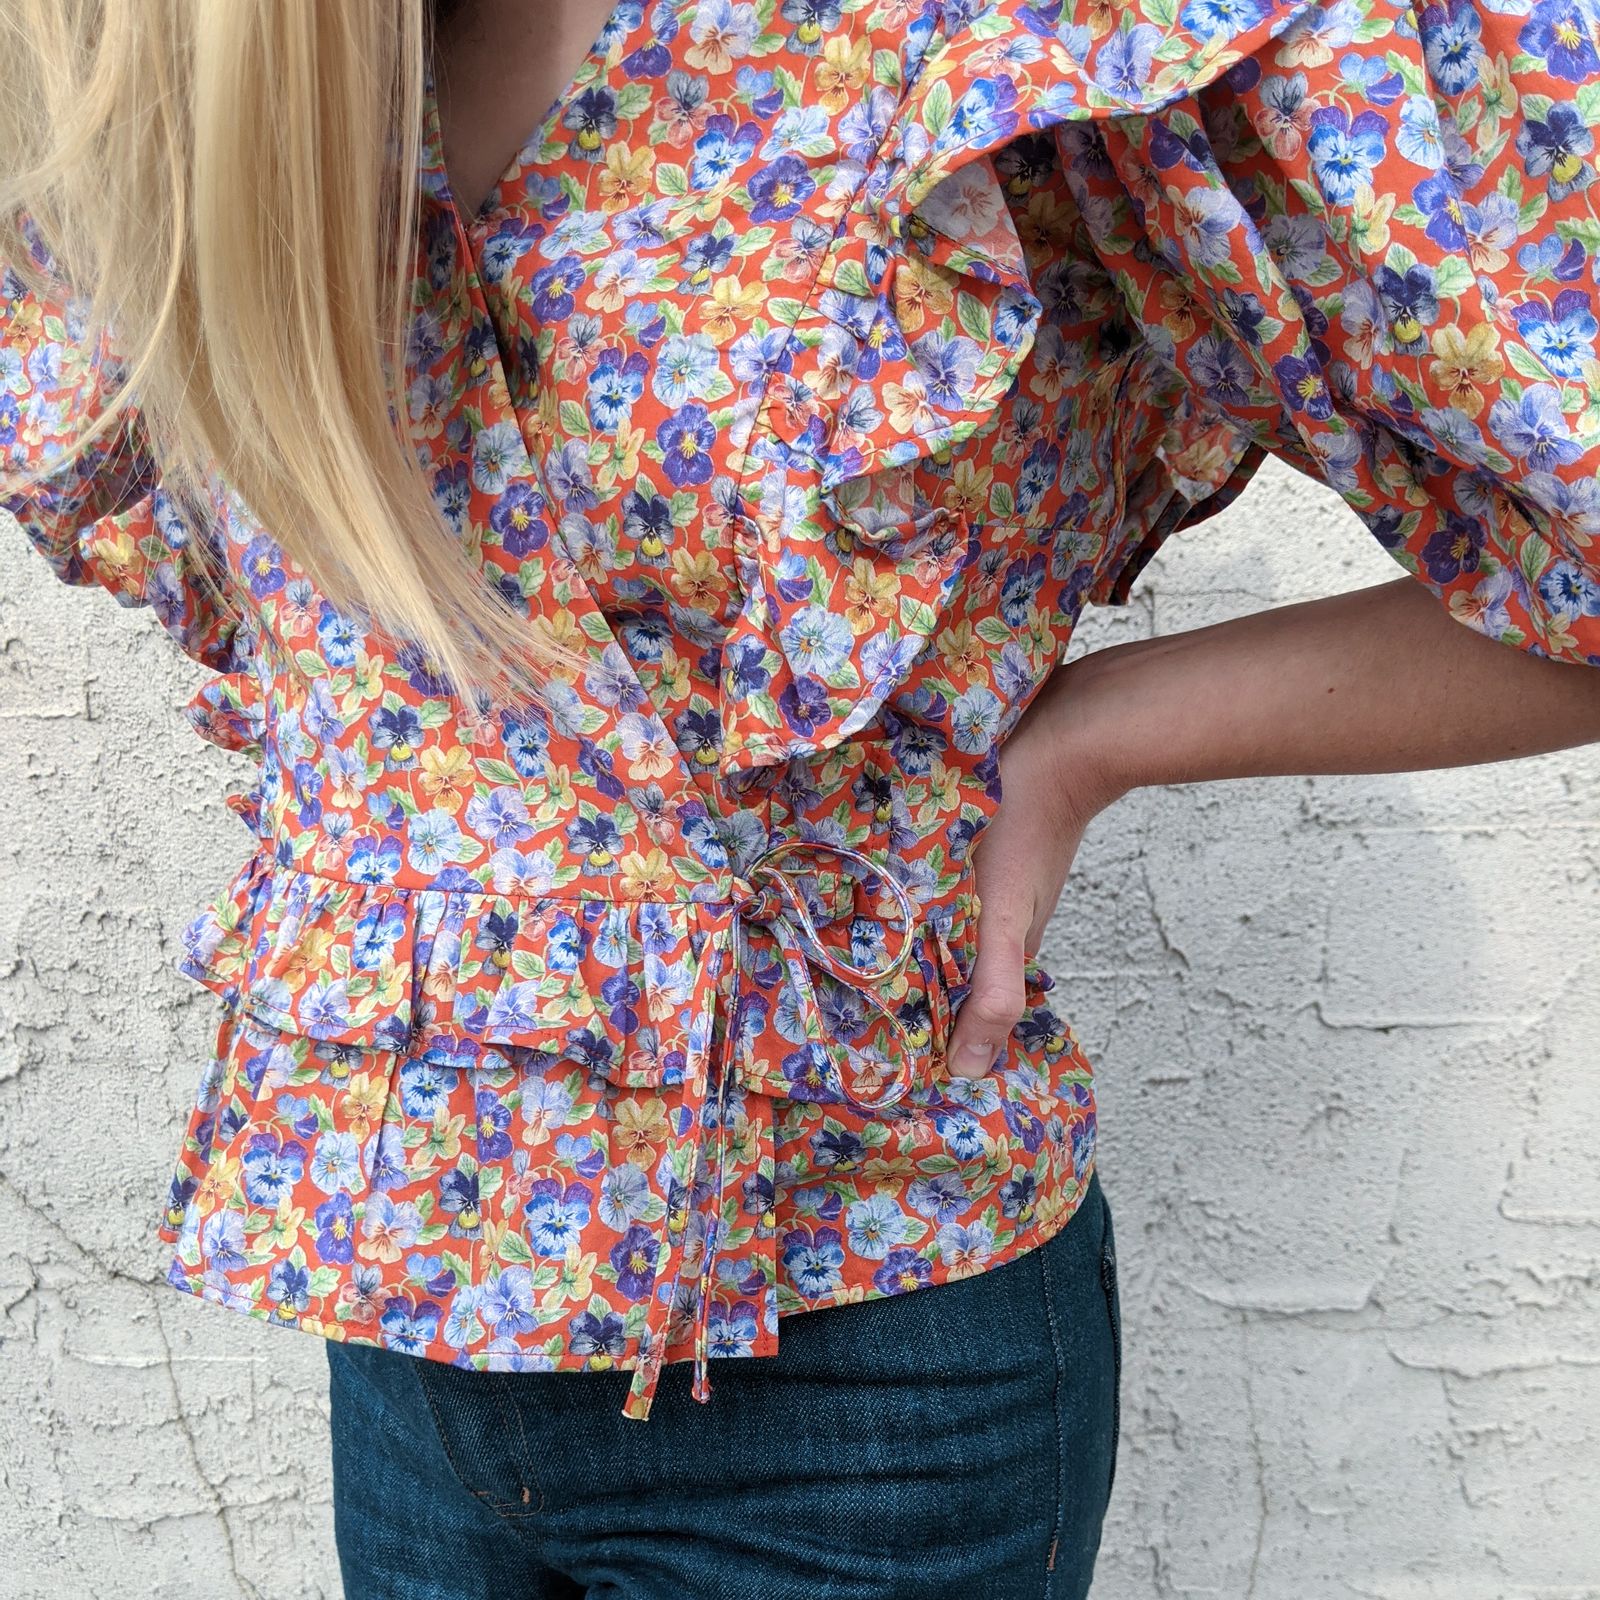
CLOSURES
I think the inspiration blouse closes with hidden snaps. I added some to my blouse to secure the cross front, and the V point of the neck.
I also added a decorative tie at the waist! this was just made from some of the bias tape I'd made with the fabric scraps.
CONSTRUCTION NOTES
Not going to do full assembly instructions, but here are a few notes:
Ruffles
I stitched all ruffle panels/sets together and finished all the edges that are visible in the finished garment before inserting.
Neckline
I cut a second set of CF pieces and fully faced the CF Bodice. I wanted to add structure without interfacing, and I was able to hide some seams under it. Finished the back neckline with bias binding before assembling the shoulder seams.
Alternatively, the entire neckline could be finished with bias binding after the shoulder seams are sewn.