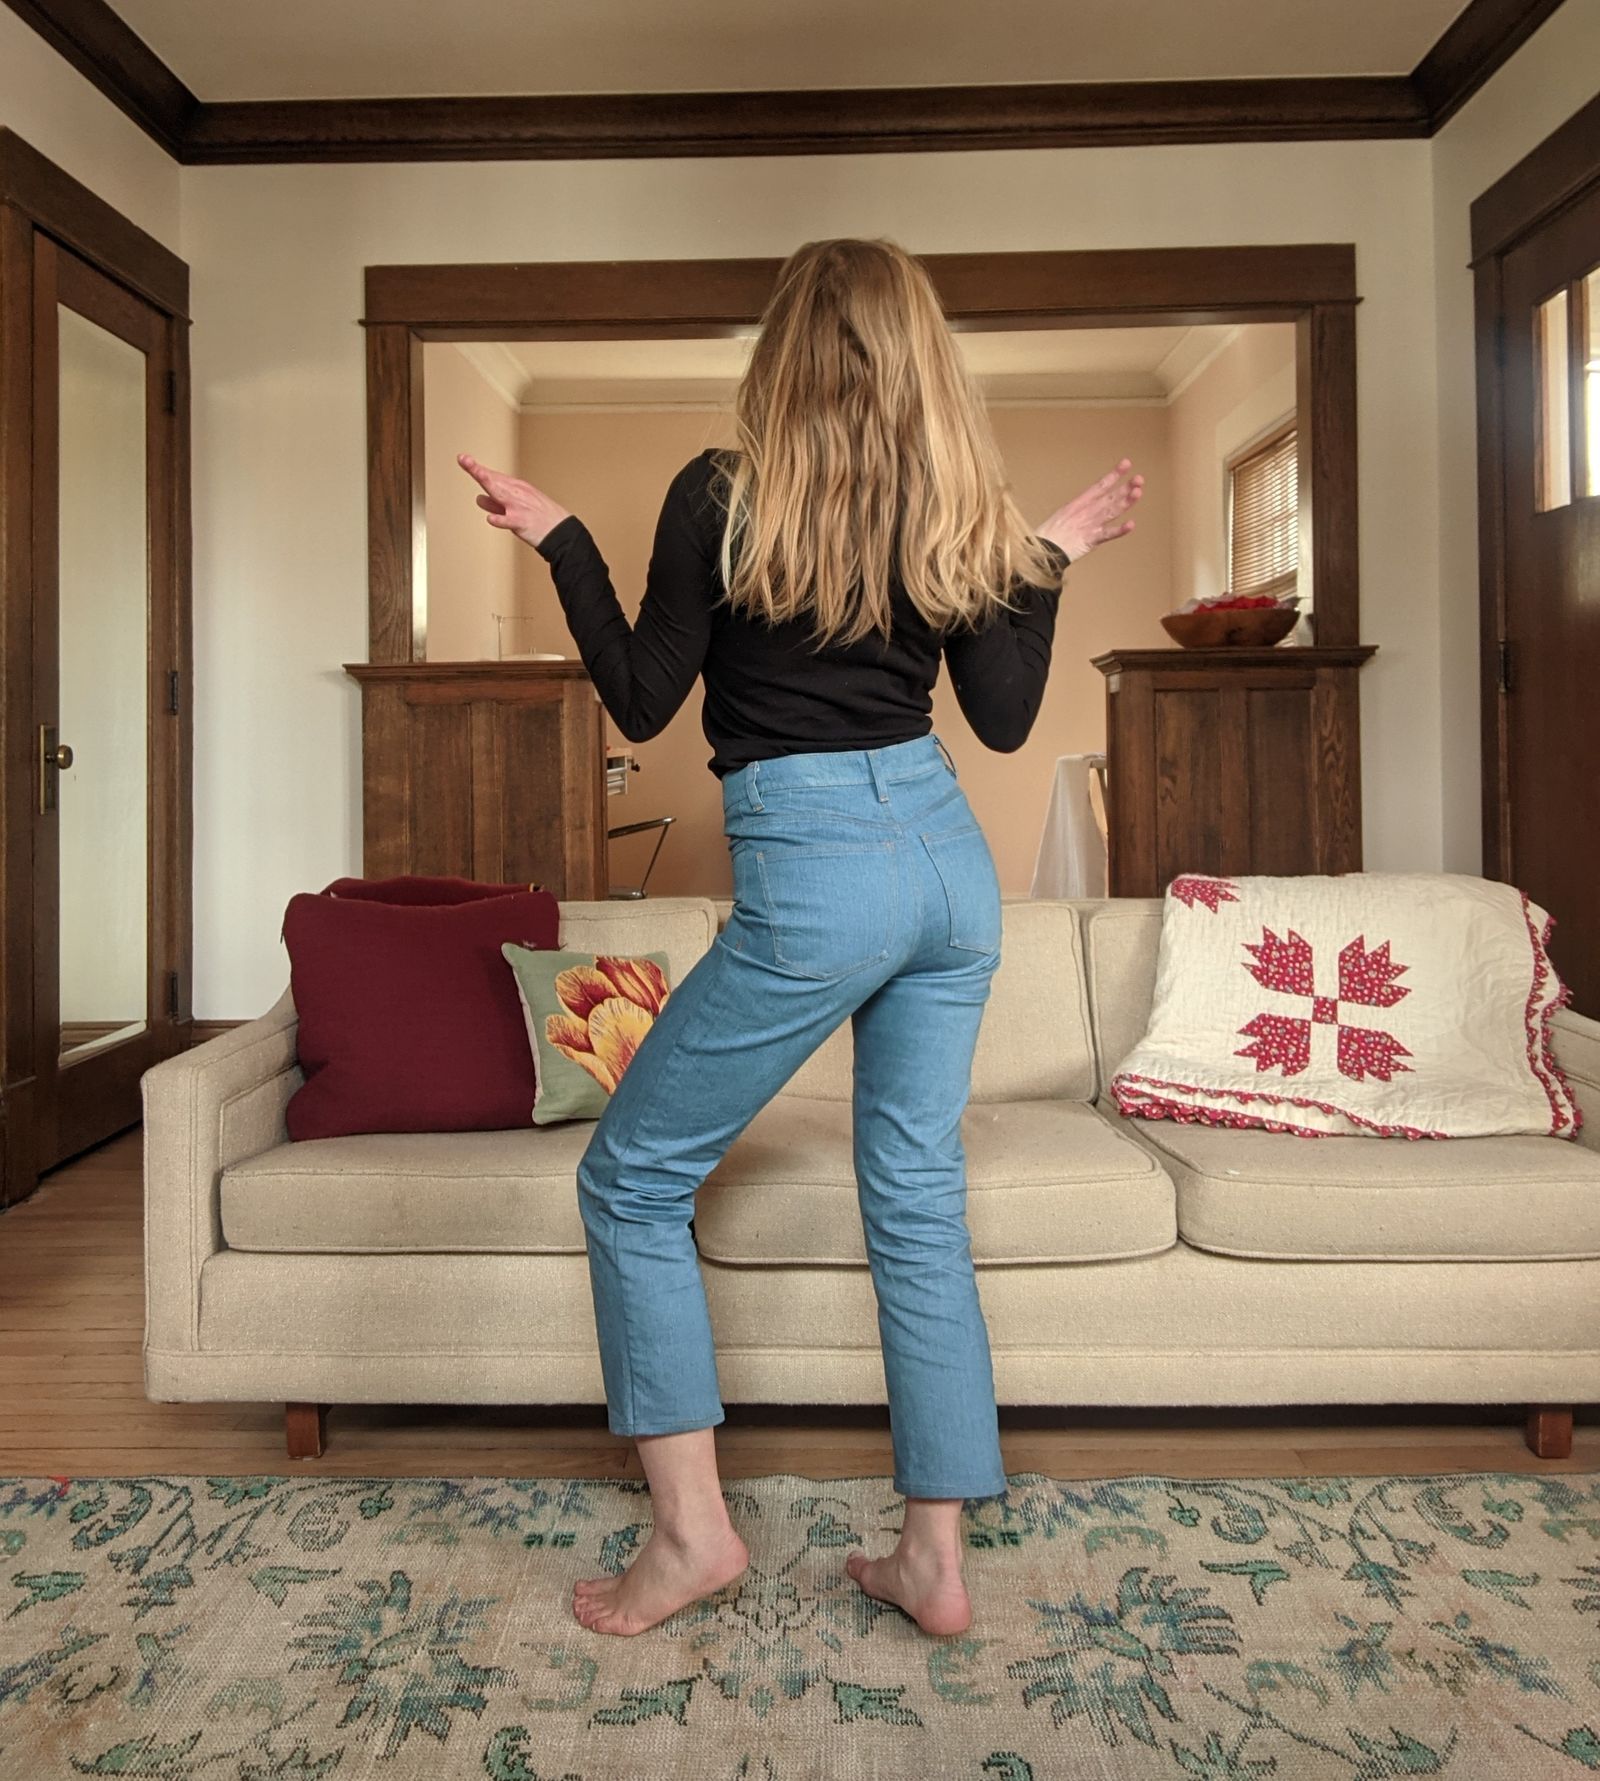
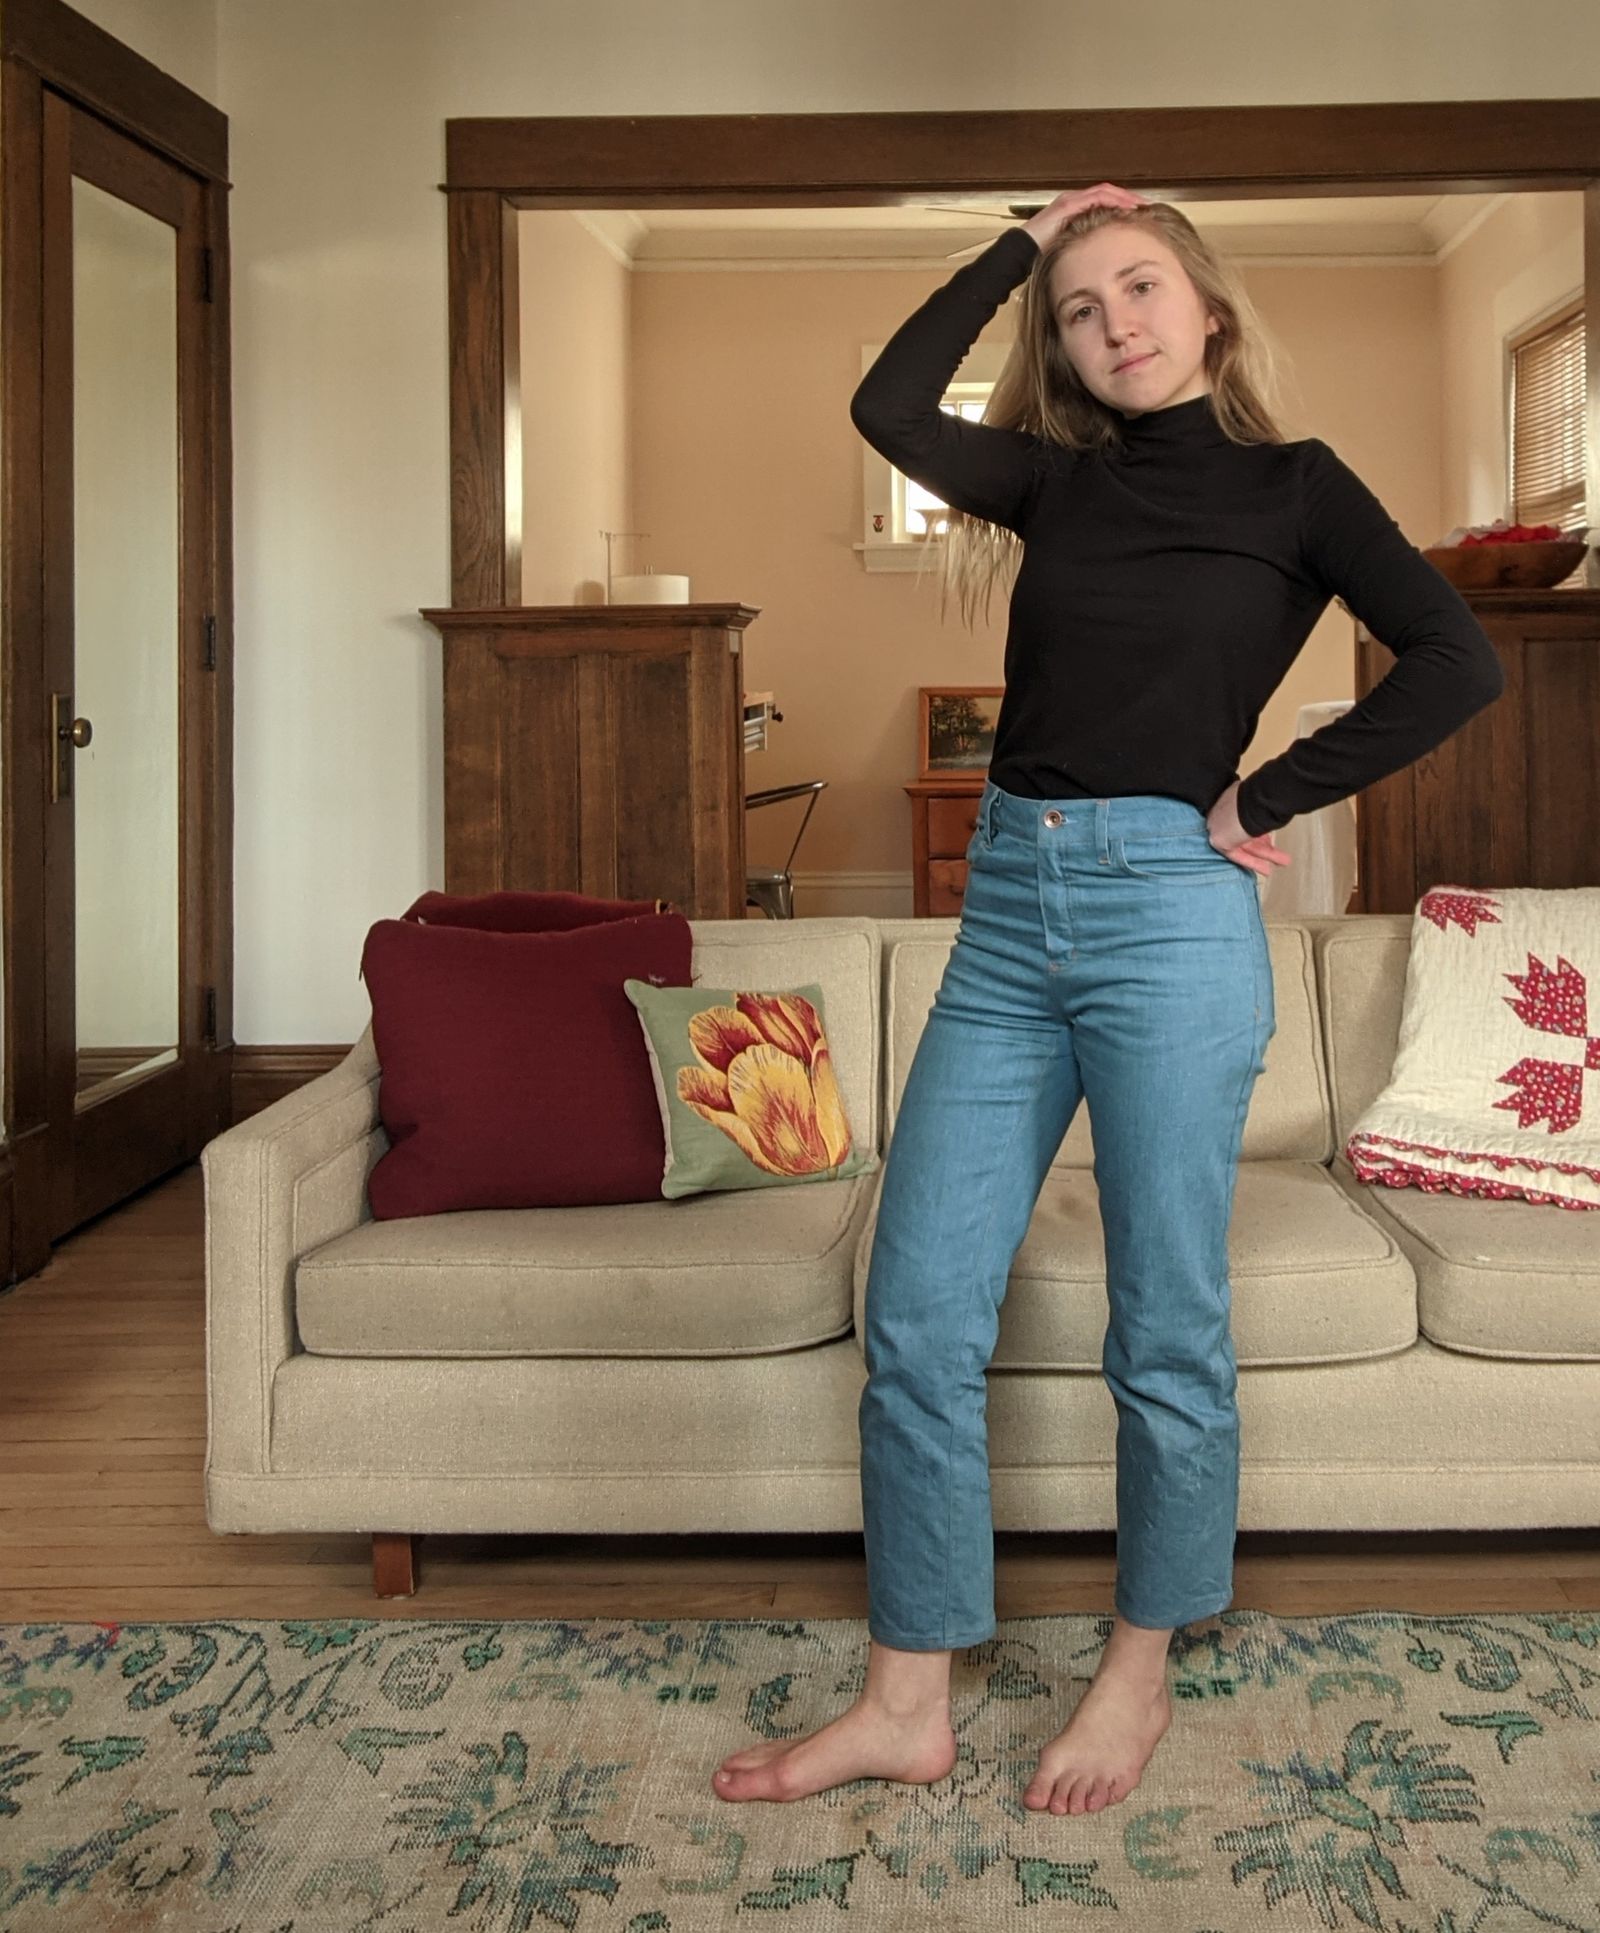
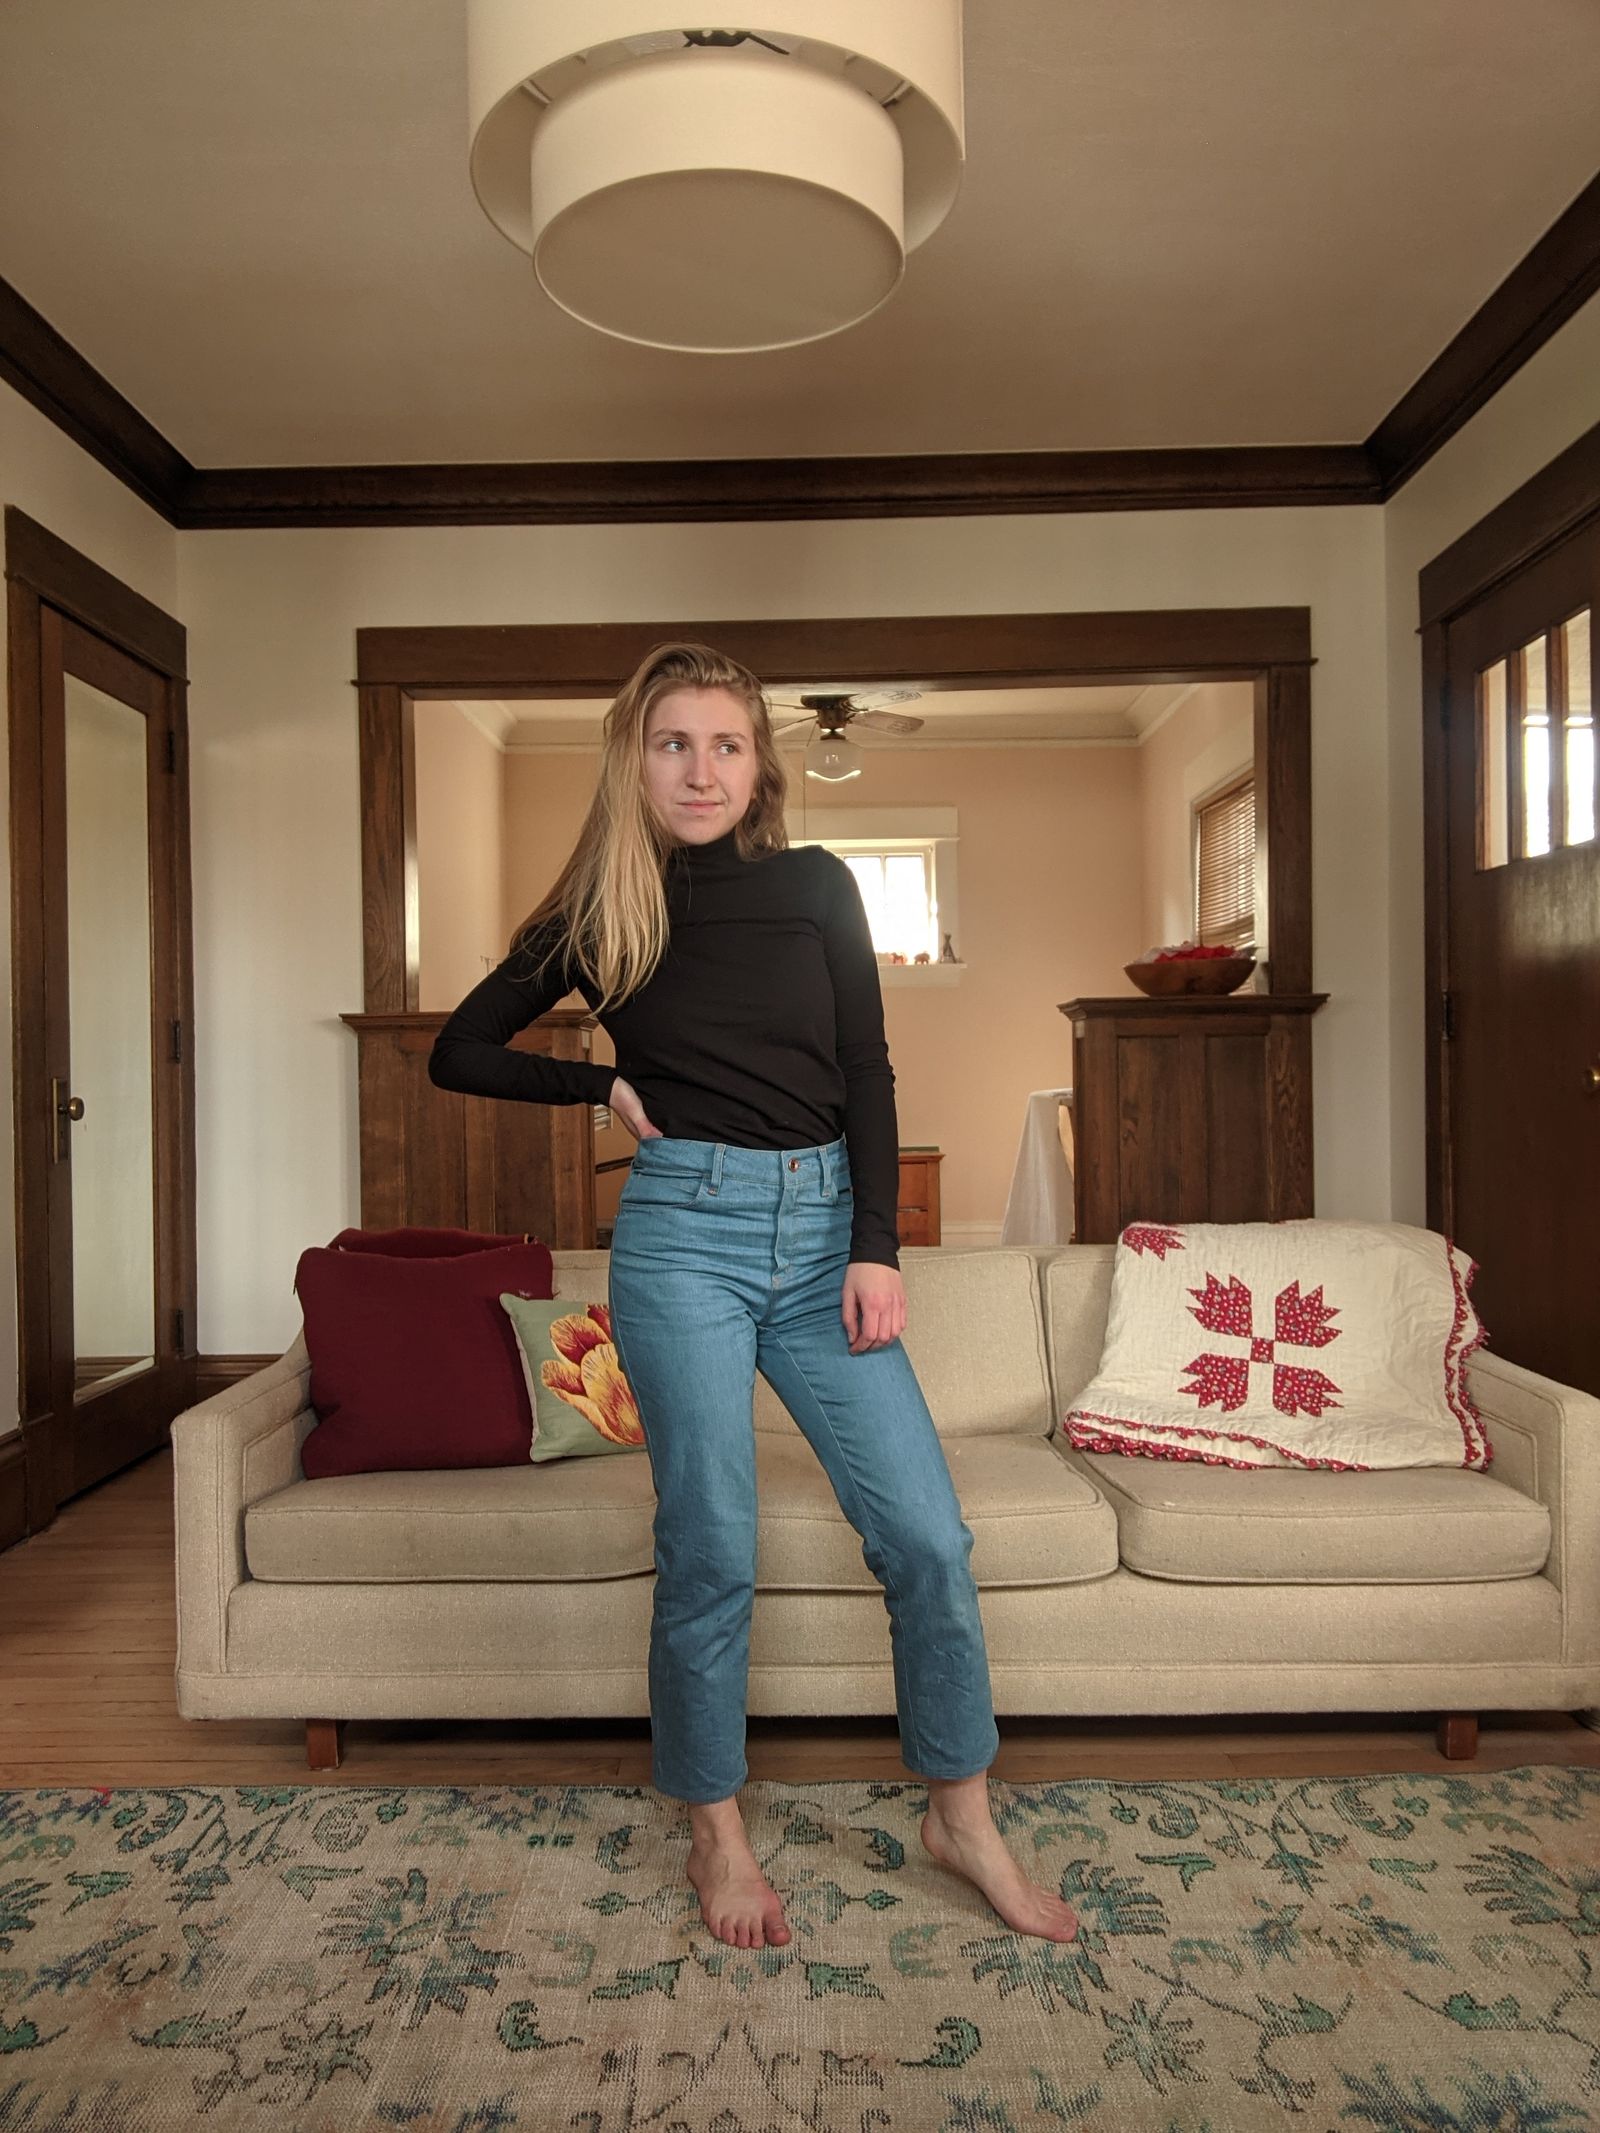
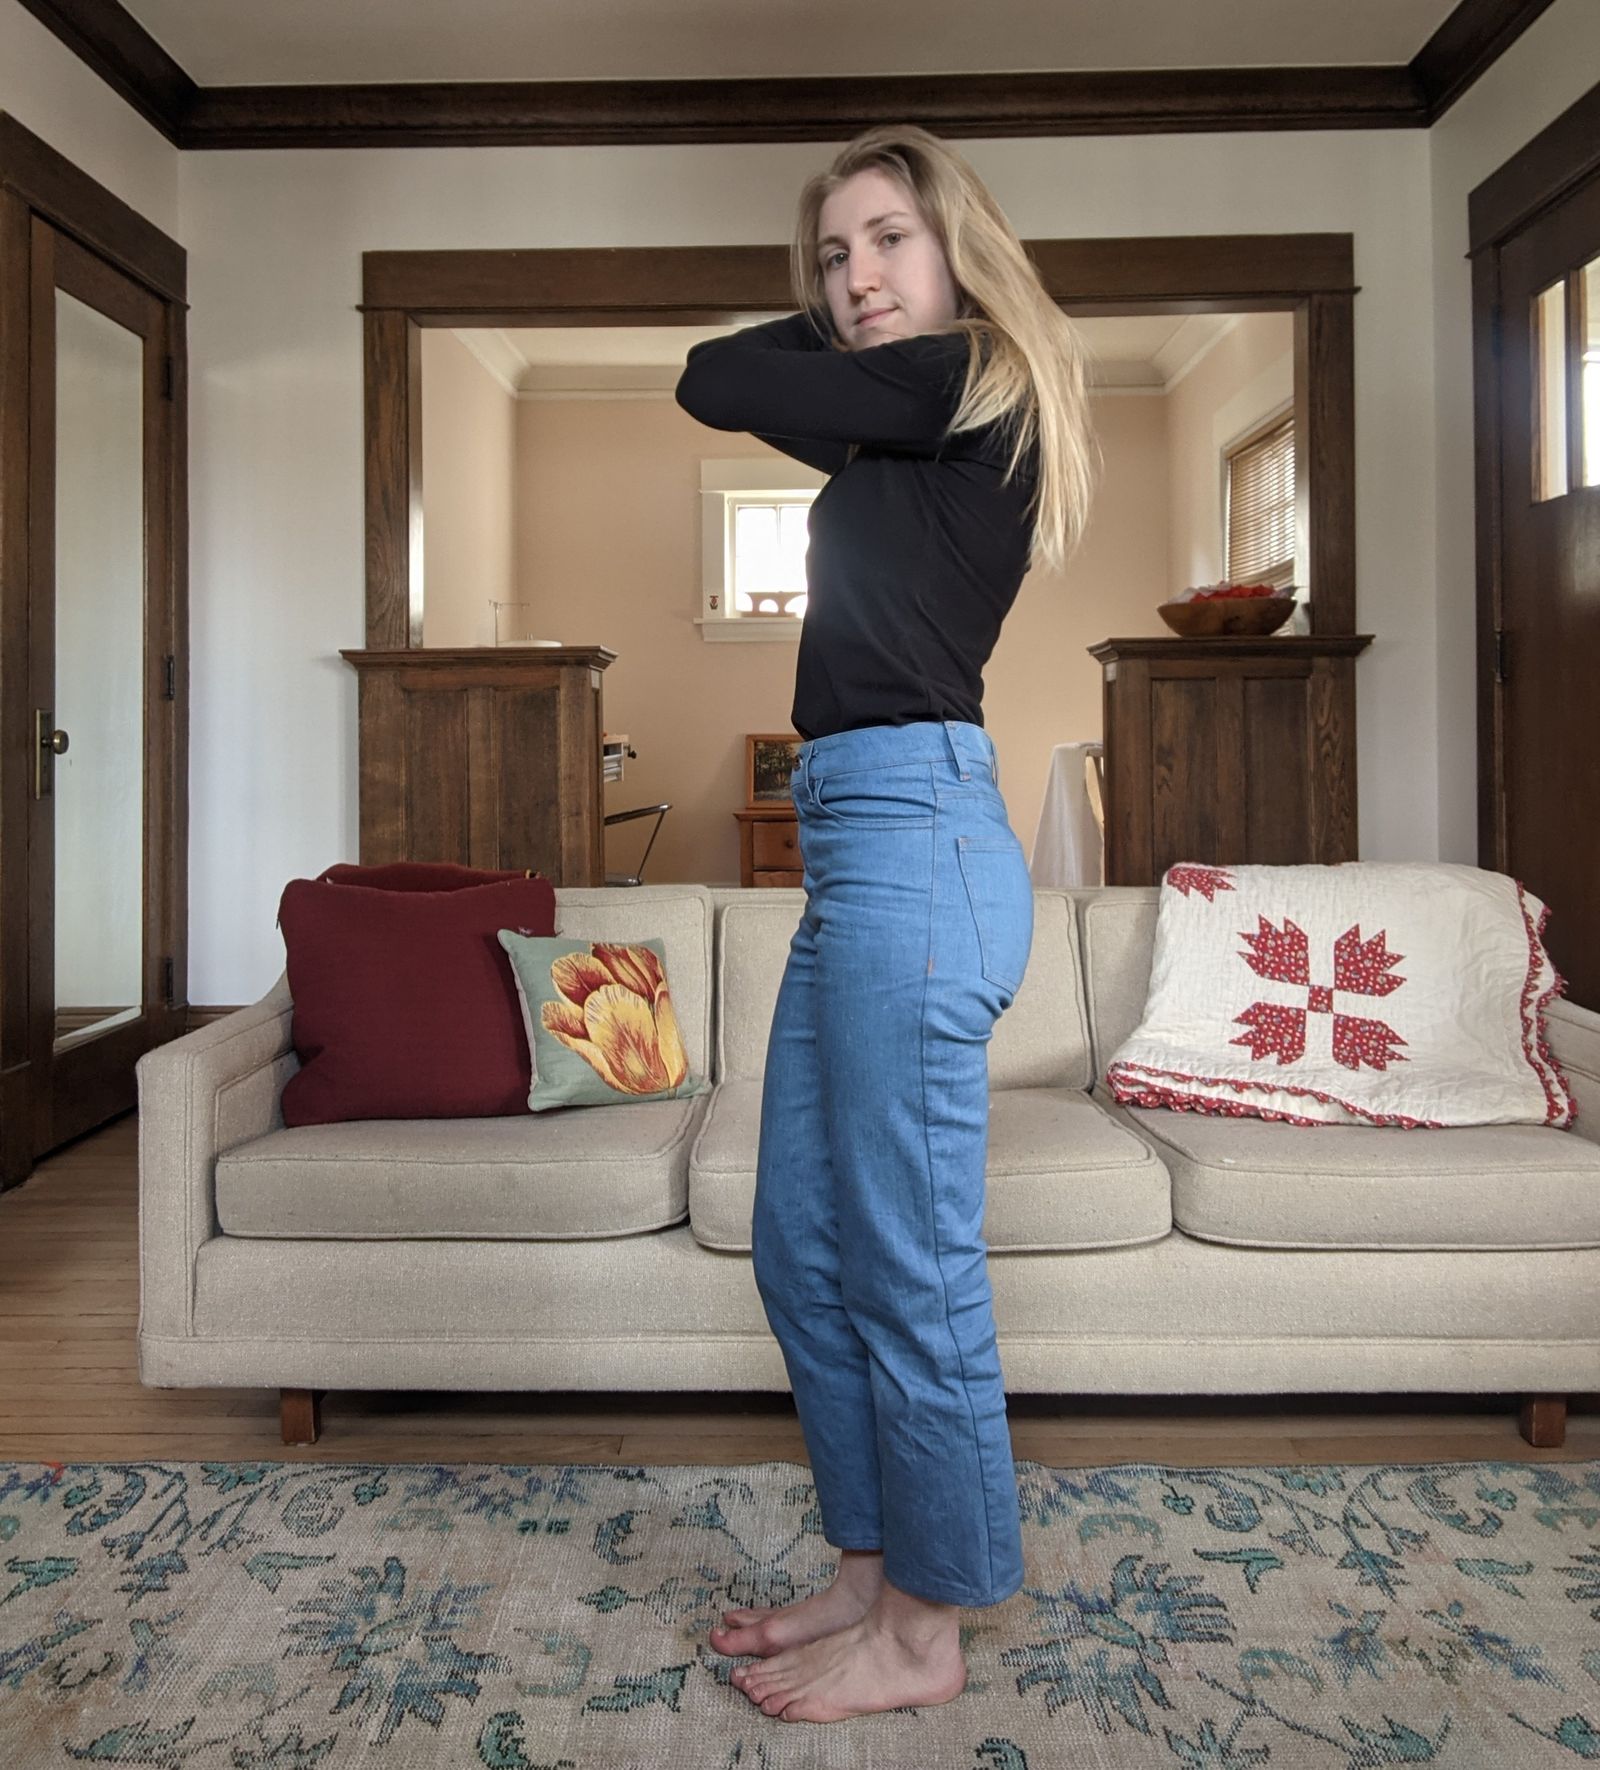
Bleached Ash Jeans
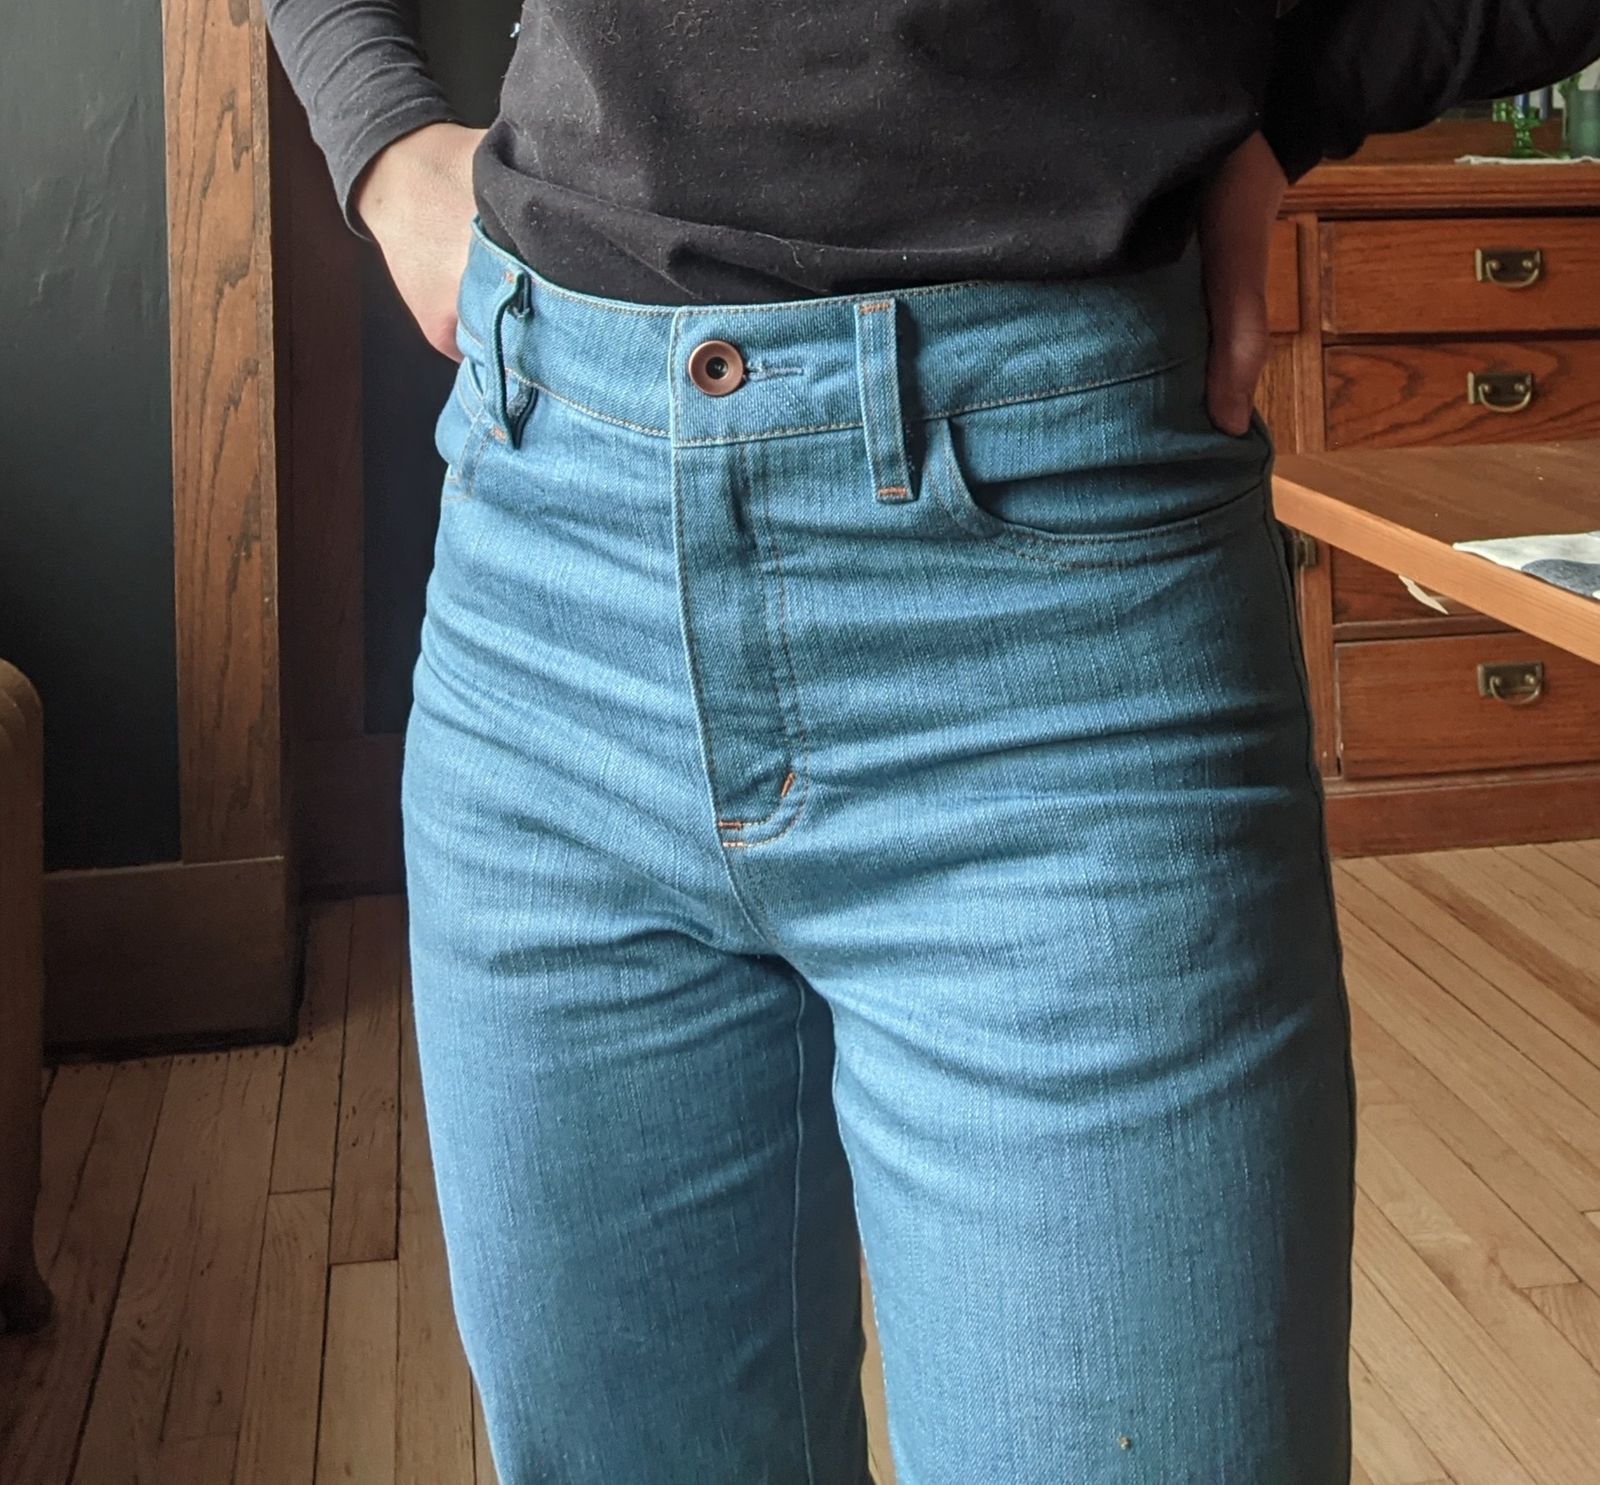
Bleached some denim just for fun :)
Pattern
Cut the leg between the wide and straight leg views
Cut at the "regular crop" length
Measurements
Height: 5' 1"
Waist: 26"
Hips: 36"
Size
26
Fabric
10oz Cone Mills S-Gene
Notions
Topstitch Thread: Mara 70, 448
Button: Citron Jeans
Construction Adjustments
- Gotta do the full front pocket facing.
- I prefer Closet Core's fly method, so I add fly extensions to my pattern pieces and use their instructions.
- Cut belt loops longer, 3.5"
Fit Adjustments
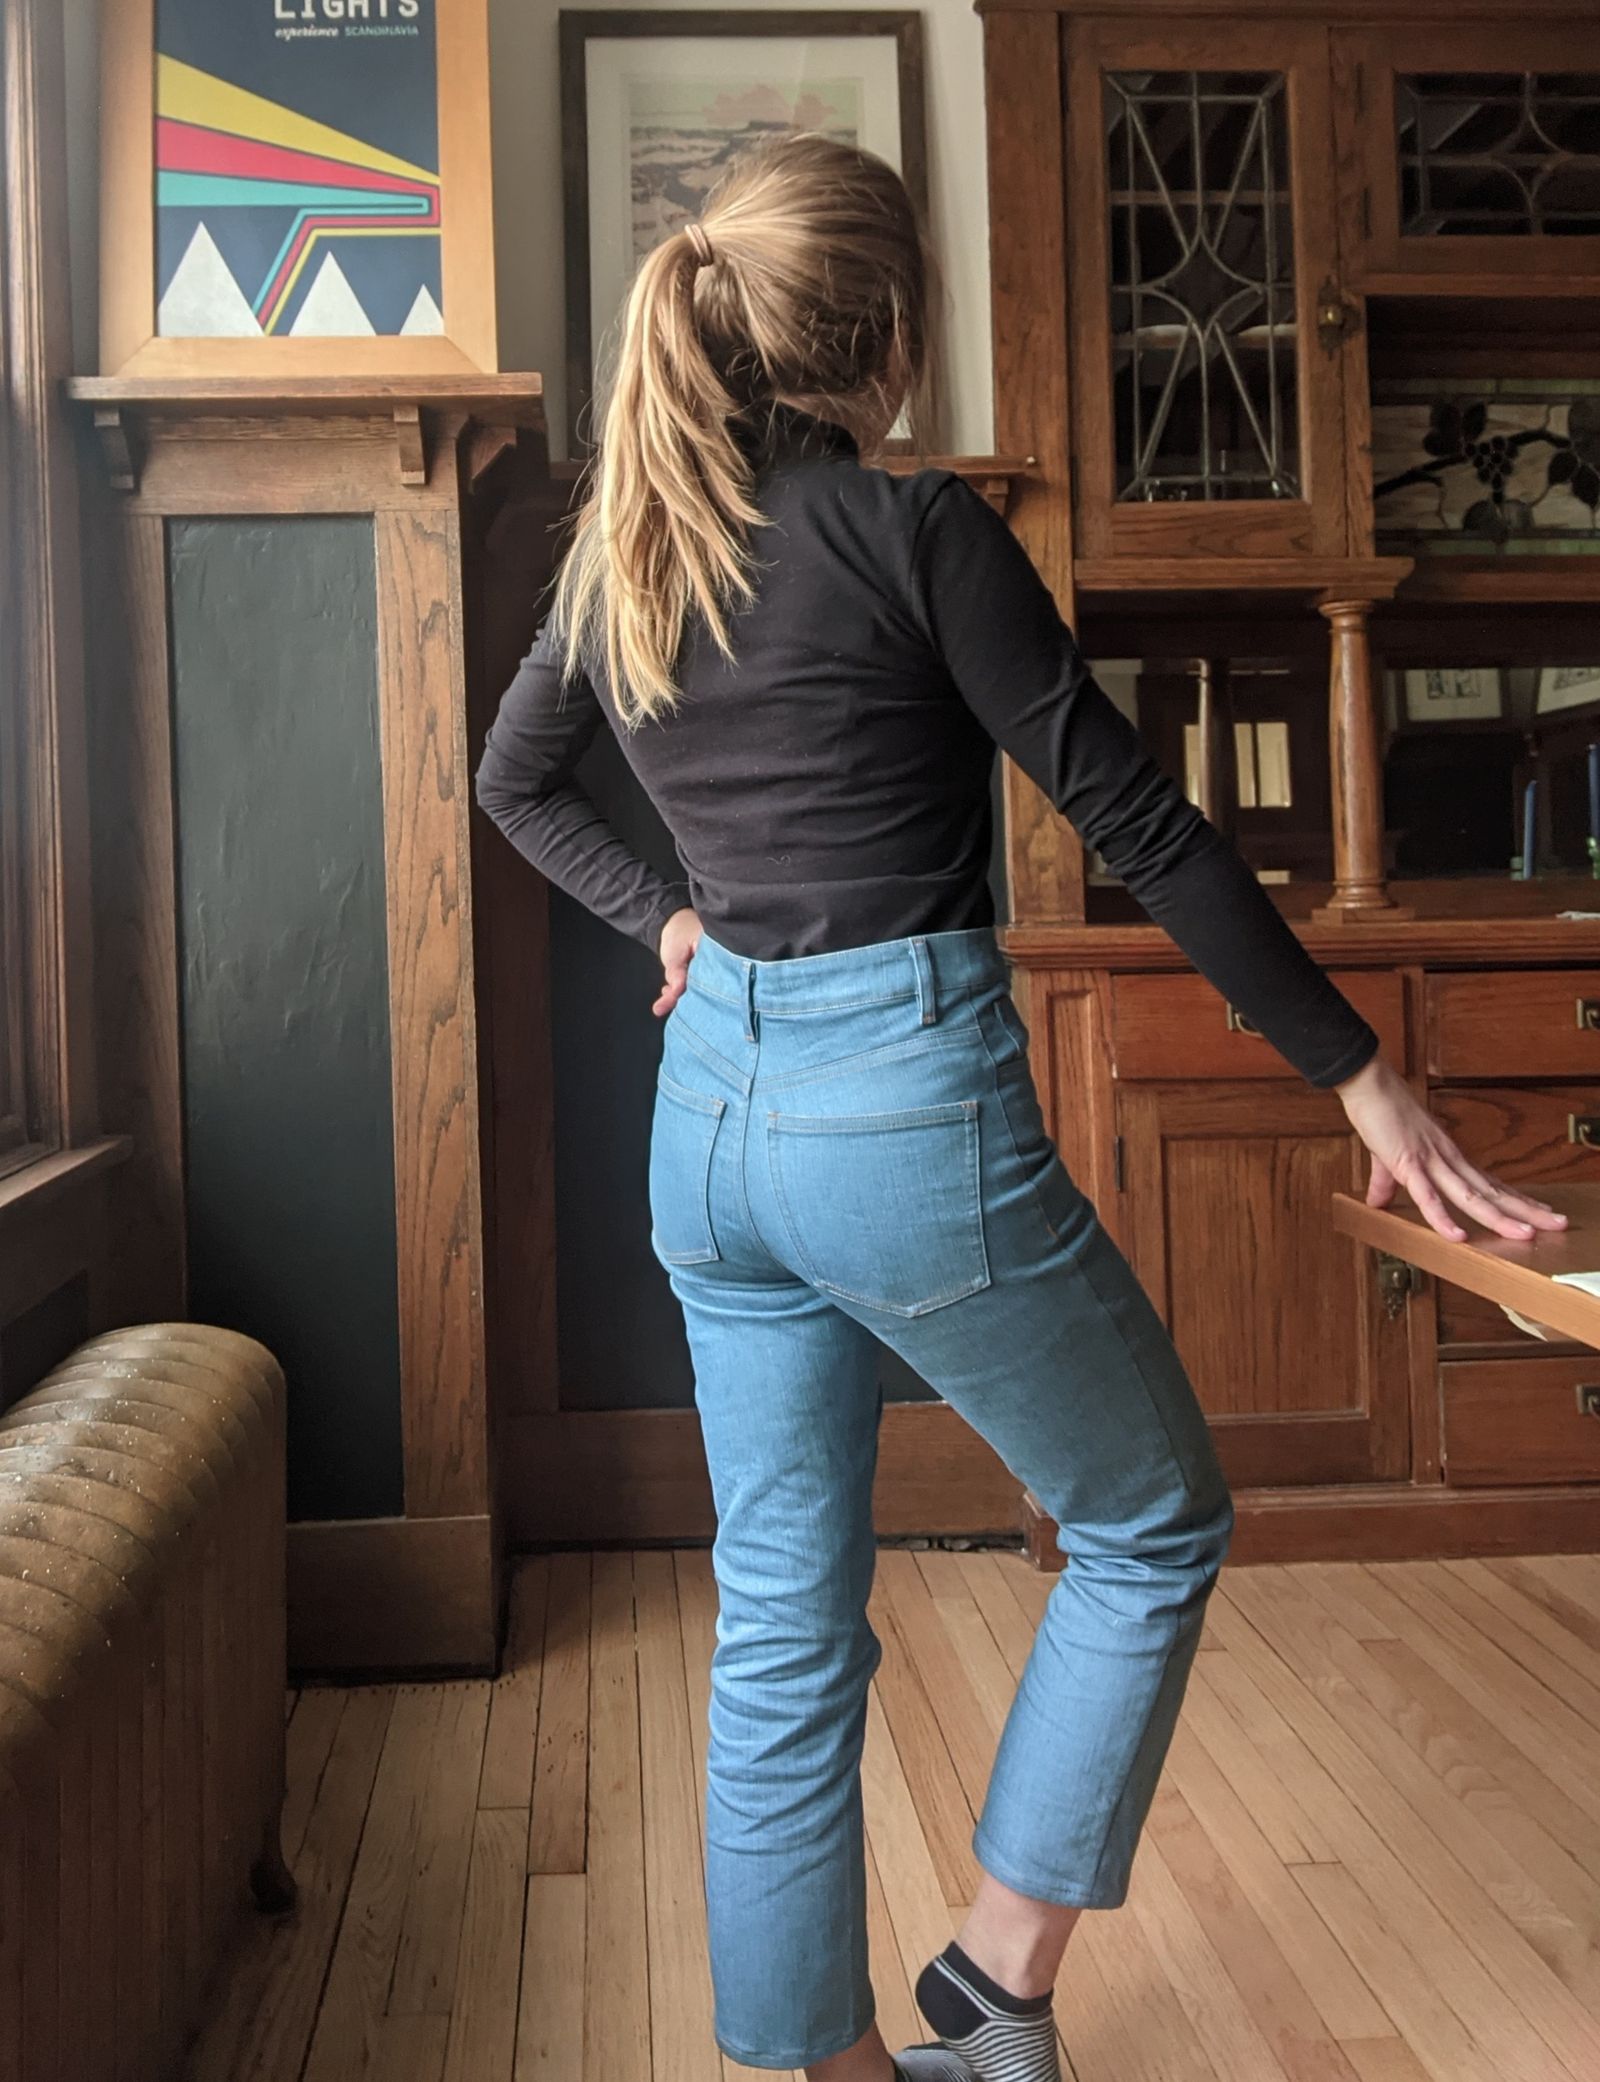
Scooped out/angled back crotch curve down
Brought top center back of back leg pieces down to compensate for lengthening the back crotch. Also moved pockets down to compensate
Took in the center back a bit in the yoke to mitigate gaping.
3/8" seam allowance in the hips for a little extra room. This fabric is sturdier and has more recovery than my last pair of Ash Jeans so the extra room is nice.
Knock Kneed Adjustment!! I'm super excited about this one. I don't know if I actually have knock knees, but I think the way my calves are (wide to the outside) gives me draglines that at least makes it look like I do in pants. I took 1/2" total out at the side seam and it made a huge difference.
This Closet Core jeans fitting post is a good reference for this adjustment. Instead of rotating in the middle of the pattern piece (which removes fabric at the side seam and adds some in the inseam) I slashed all the way to the inseam seam allowance and overlapped at the side seam, removing 1/2" (to avoid adding any fabric at the inseam). This worked fine for me but maybe violates a pants adjustment rule I don't know about?
Making the adjustment to just the front leg as shown in this Closet Core diagram (and as I did) will result in the front leg being shorter at the side seam than the back leg. I'm not sure of the "correct" way to solve this: should I have done the same adjustment on the back leg? The back of my leg looks ok though..? I ended up just somewhat easing the side seam together and then compensating for the mismatched length in the hemming.
Also note that if you make an adjustment like this, the grain line should stay the same as drafted through the entire leg (below the slash). The grain line can be redrawn/extended through the adjusted hip area based on the leg grainline.
Next Time
The main tweak I want to make for next time is to get the side seam straight. My calves are currently pulling the seam back so maybe I need a full calf adjustment or to work on the cut of the leg.
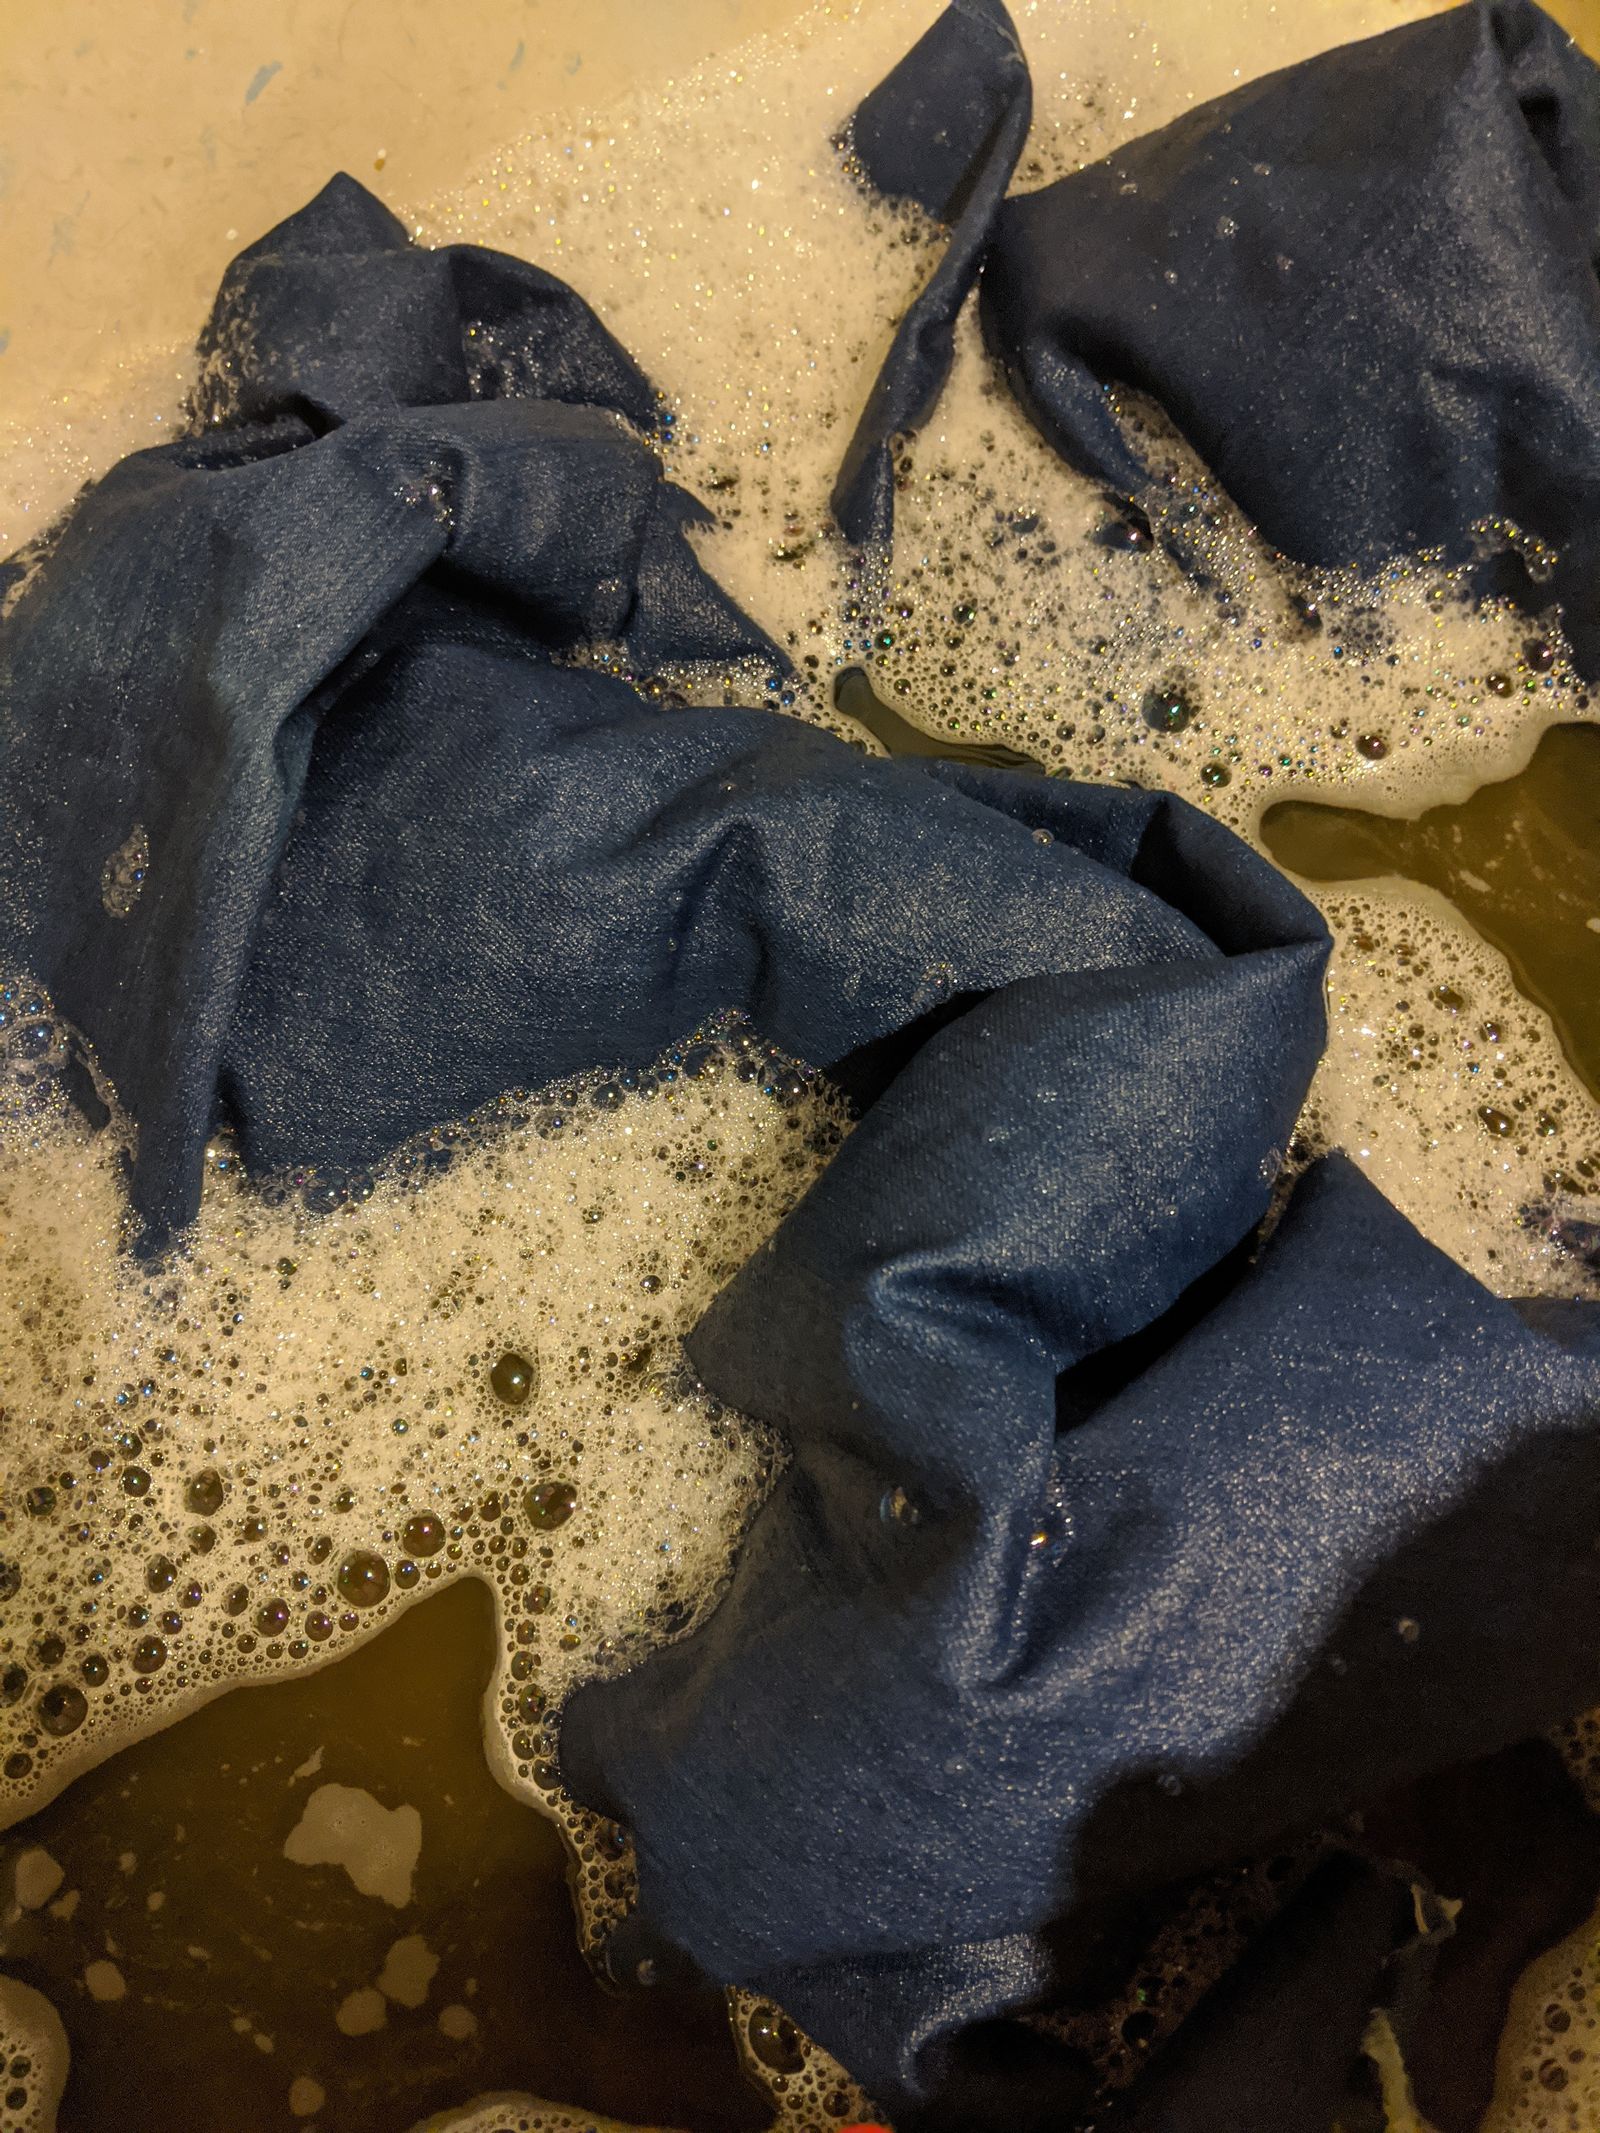
Bleaching
This was pretty simple and quite fun. Lots of blab about process but the TLDR is:
- Read this tutorial from True Bias and do what it says.
- This is 1 hour in the bleach bath.
Kelli's experiment was very thorough — she tested multiple types of denim for different lengths of time. She also shows her reference swatches all laid out together which I found helpful. As I was mostly interested in just trying bleaching and didn't have a super specific color in mind I wanted to achieve, I was able to use her examples as a loose guide instead of testing that many swatches myself. Decided I'd go for something that was around the 45-60 minute range as those were all solid medium wash outcomes — enough to make it clear the fabric had been bleached, but not too light wash.
Popped a test swatch in some bleach and after 1hr it wasn't looking terribly bleached, so I left it in 30 minutes more. After a wash and dry it had turned out VERY bleached so I planned to leave my actual fabric in for just 1 hour as originally planned.
Didn't do a second test swatch and yes it would have been easy to do multiple swatches from the start but I didn't, and decided I would be cool with whatever I ended up getting.
Things you should know
- The fabric will appear much darker in the bleach bath than it will after being rinsed and dried. (Of course, it's soaked!) Don't let that deceive you and trust the timing.
- To bleach a cut of fabric big enough for pants or a jacket, have at least one jug of bleach on hand. I used nearly one whole jug to achieve the 4 parts water/1 part bleach ratio in a bath big enough for the 2-3 yards of fabric.
- I liked using the laundry room tub sink and would recommend doing that if you have one. Otherwise I'd recommend a large, sturdy, plastic storage tote. I've heard bathtubs can work but I'd worry about staining? A bathtub would also require more water/bleach, but it might have more room for fabric to spread out and bleach evenly.
My process
- Prewash the fabric and dry as you normally would (I usually prewash fabric right away, so this had already been done. I think I washed cold and air dried)
- Get the cut of fabric saturated with water. I put mine through just a rinse cycle in the washer.
- Make your 4 part water to 1 part bleach mix. I made mine in our large laundry sink. It was about halfway full, and that was probably probably the smallest amount of water that would have worked.
- Add your saturated fabric to the bleach water
- Wearing rubber gloves, agitated the fabric for 15 minutes to make sure all parts of the fabric were introduced to the bleach. .
- Leave fabric to soak for desired amount of time. Make sure it is submerged. Weigh it down if needed. I used a full bottle of laundry detergent in a bucket to weigh down any stubborn areas.
- Agitated the fabric every 10-15 minutes
- Drain the sink/remove the fabric from the water/bleach
- Rinse the fabric. I just rinsed until all the bubbles from the bleach were gone
- Put the fabric through at least another rinse cycle in the wash. If you want you could add detergent and do the whole cycle.
- Dry fabric as you normally would. I like to treat my fabric more harshly in prewash, so even though I usually air dry my jeans I threw this cut in the dryer.
- Iron it! Check it out! Did it bleach evenly?
My Bleaching Results
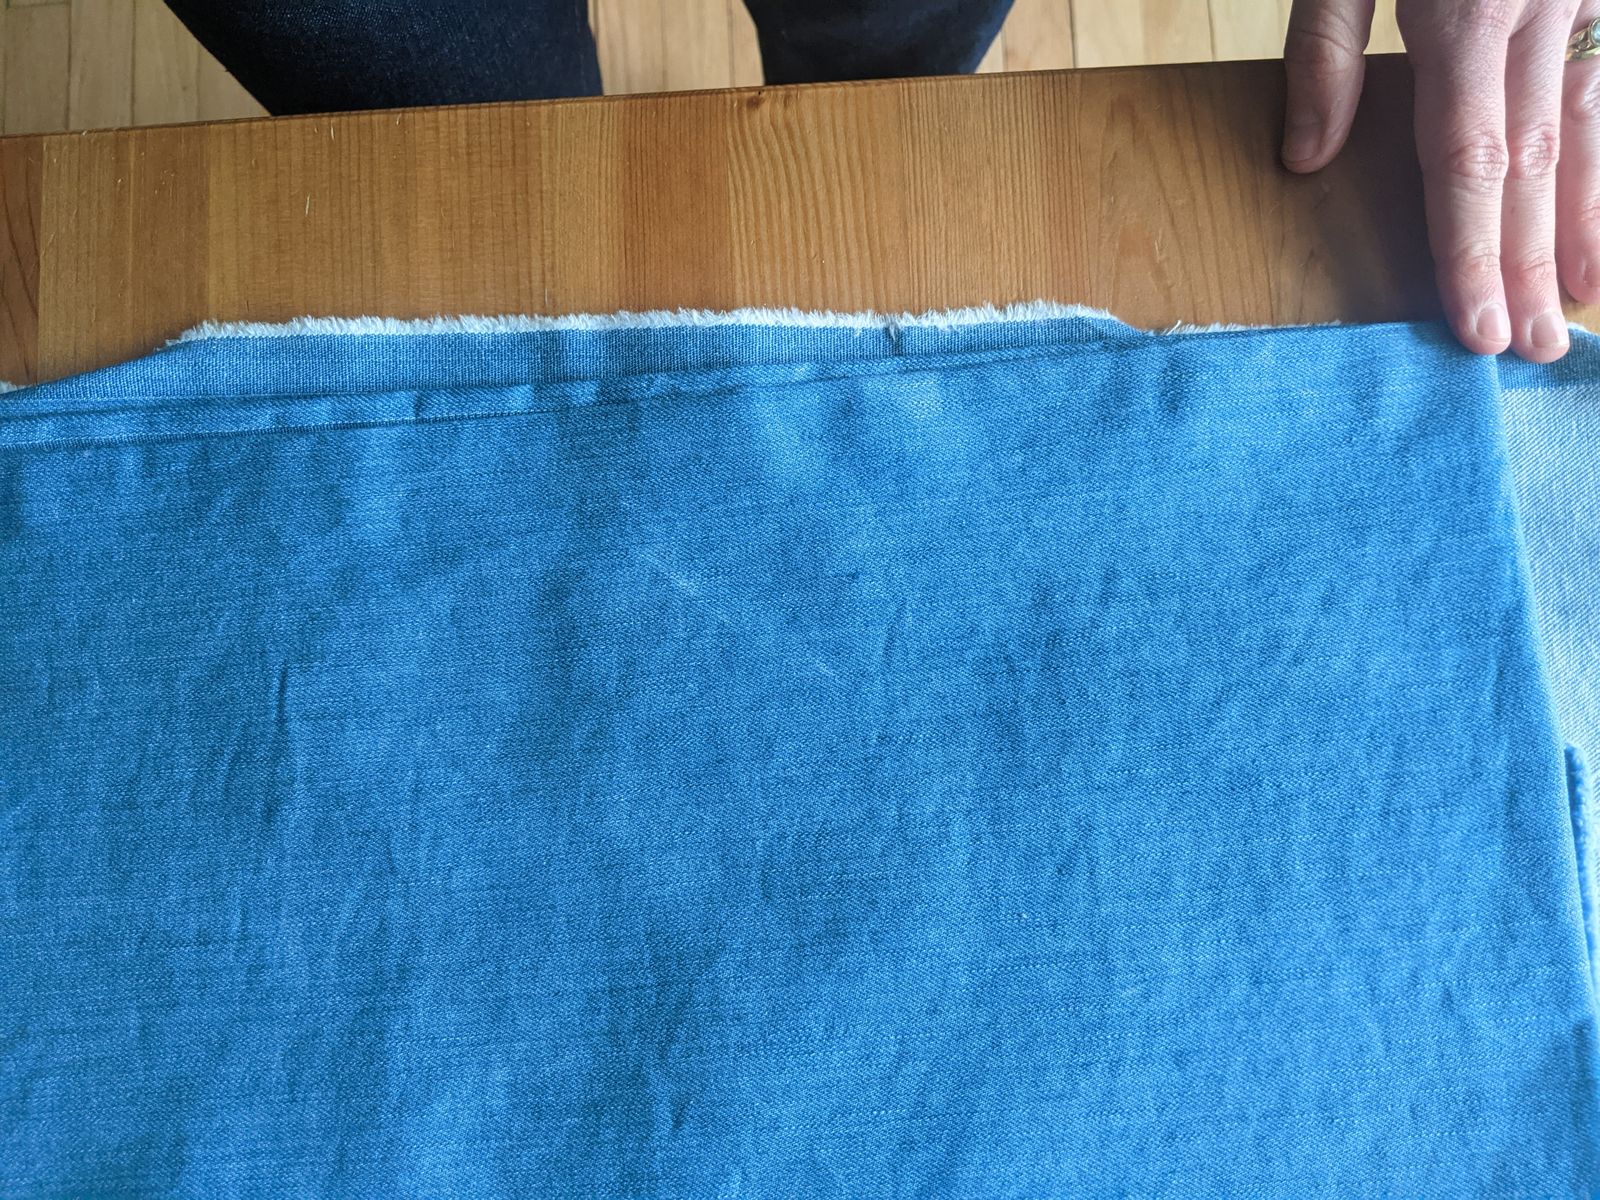
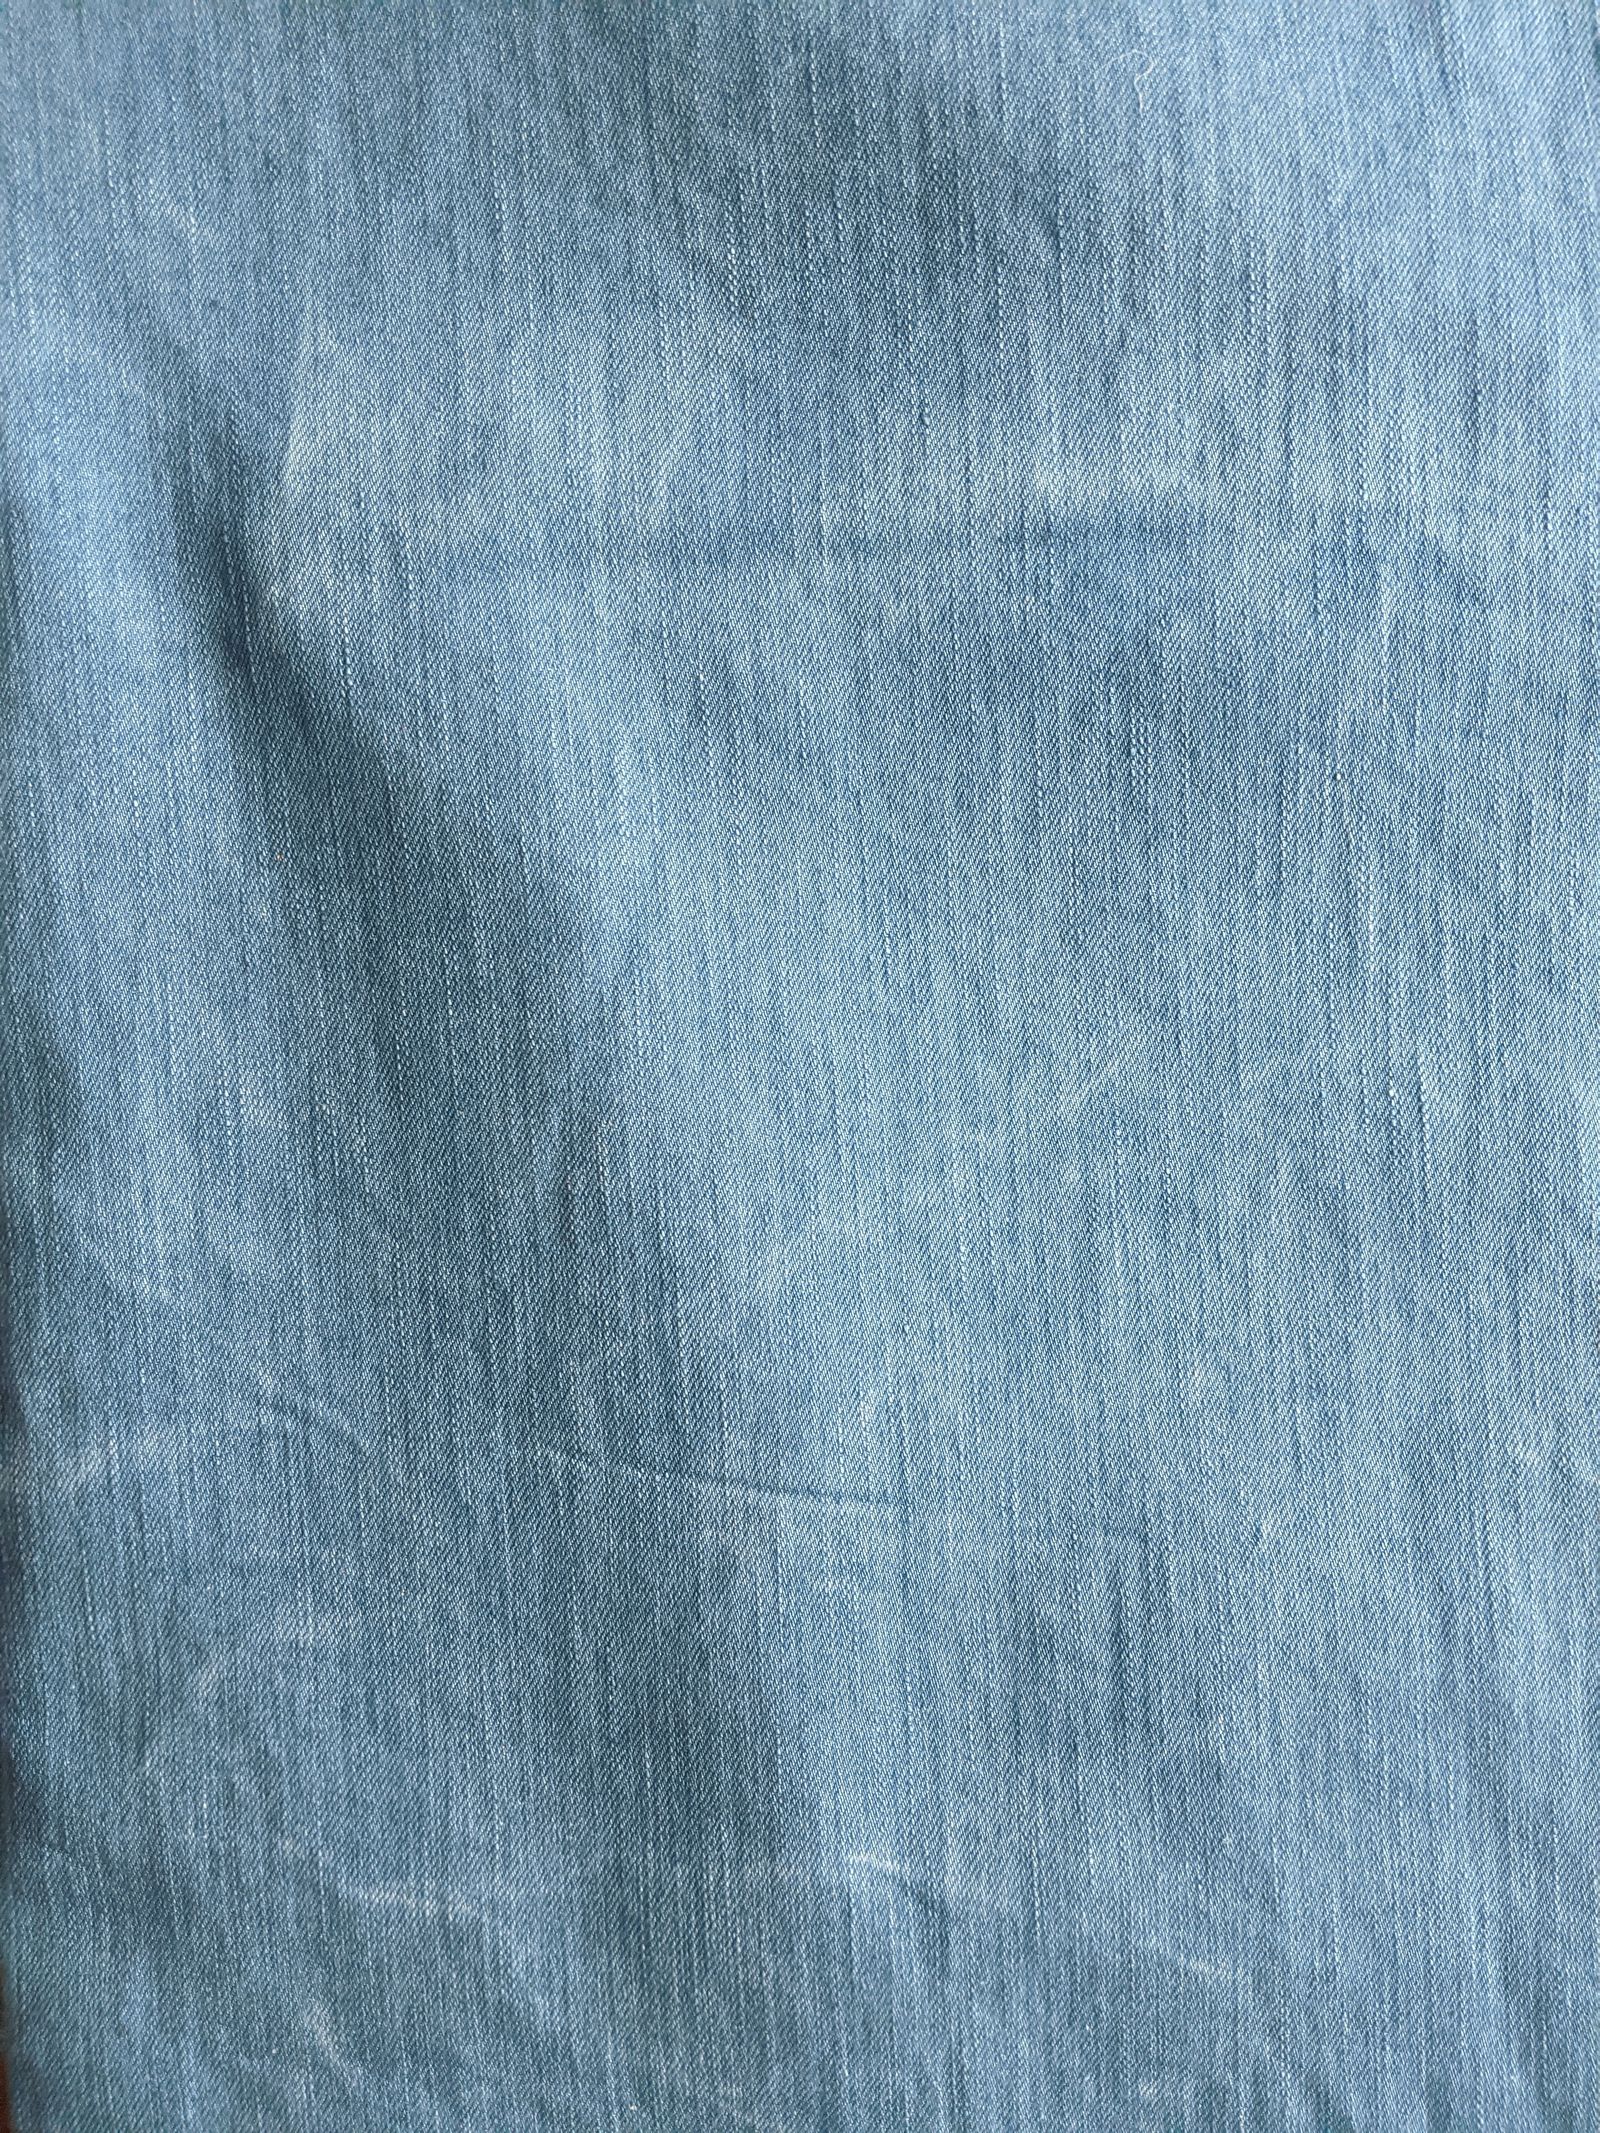
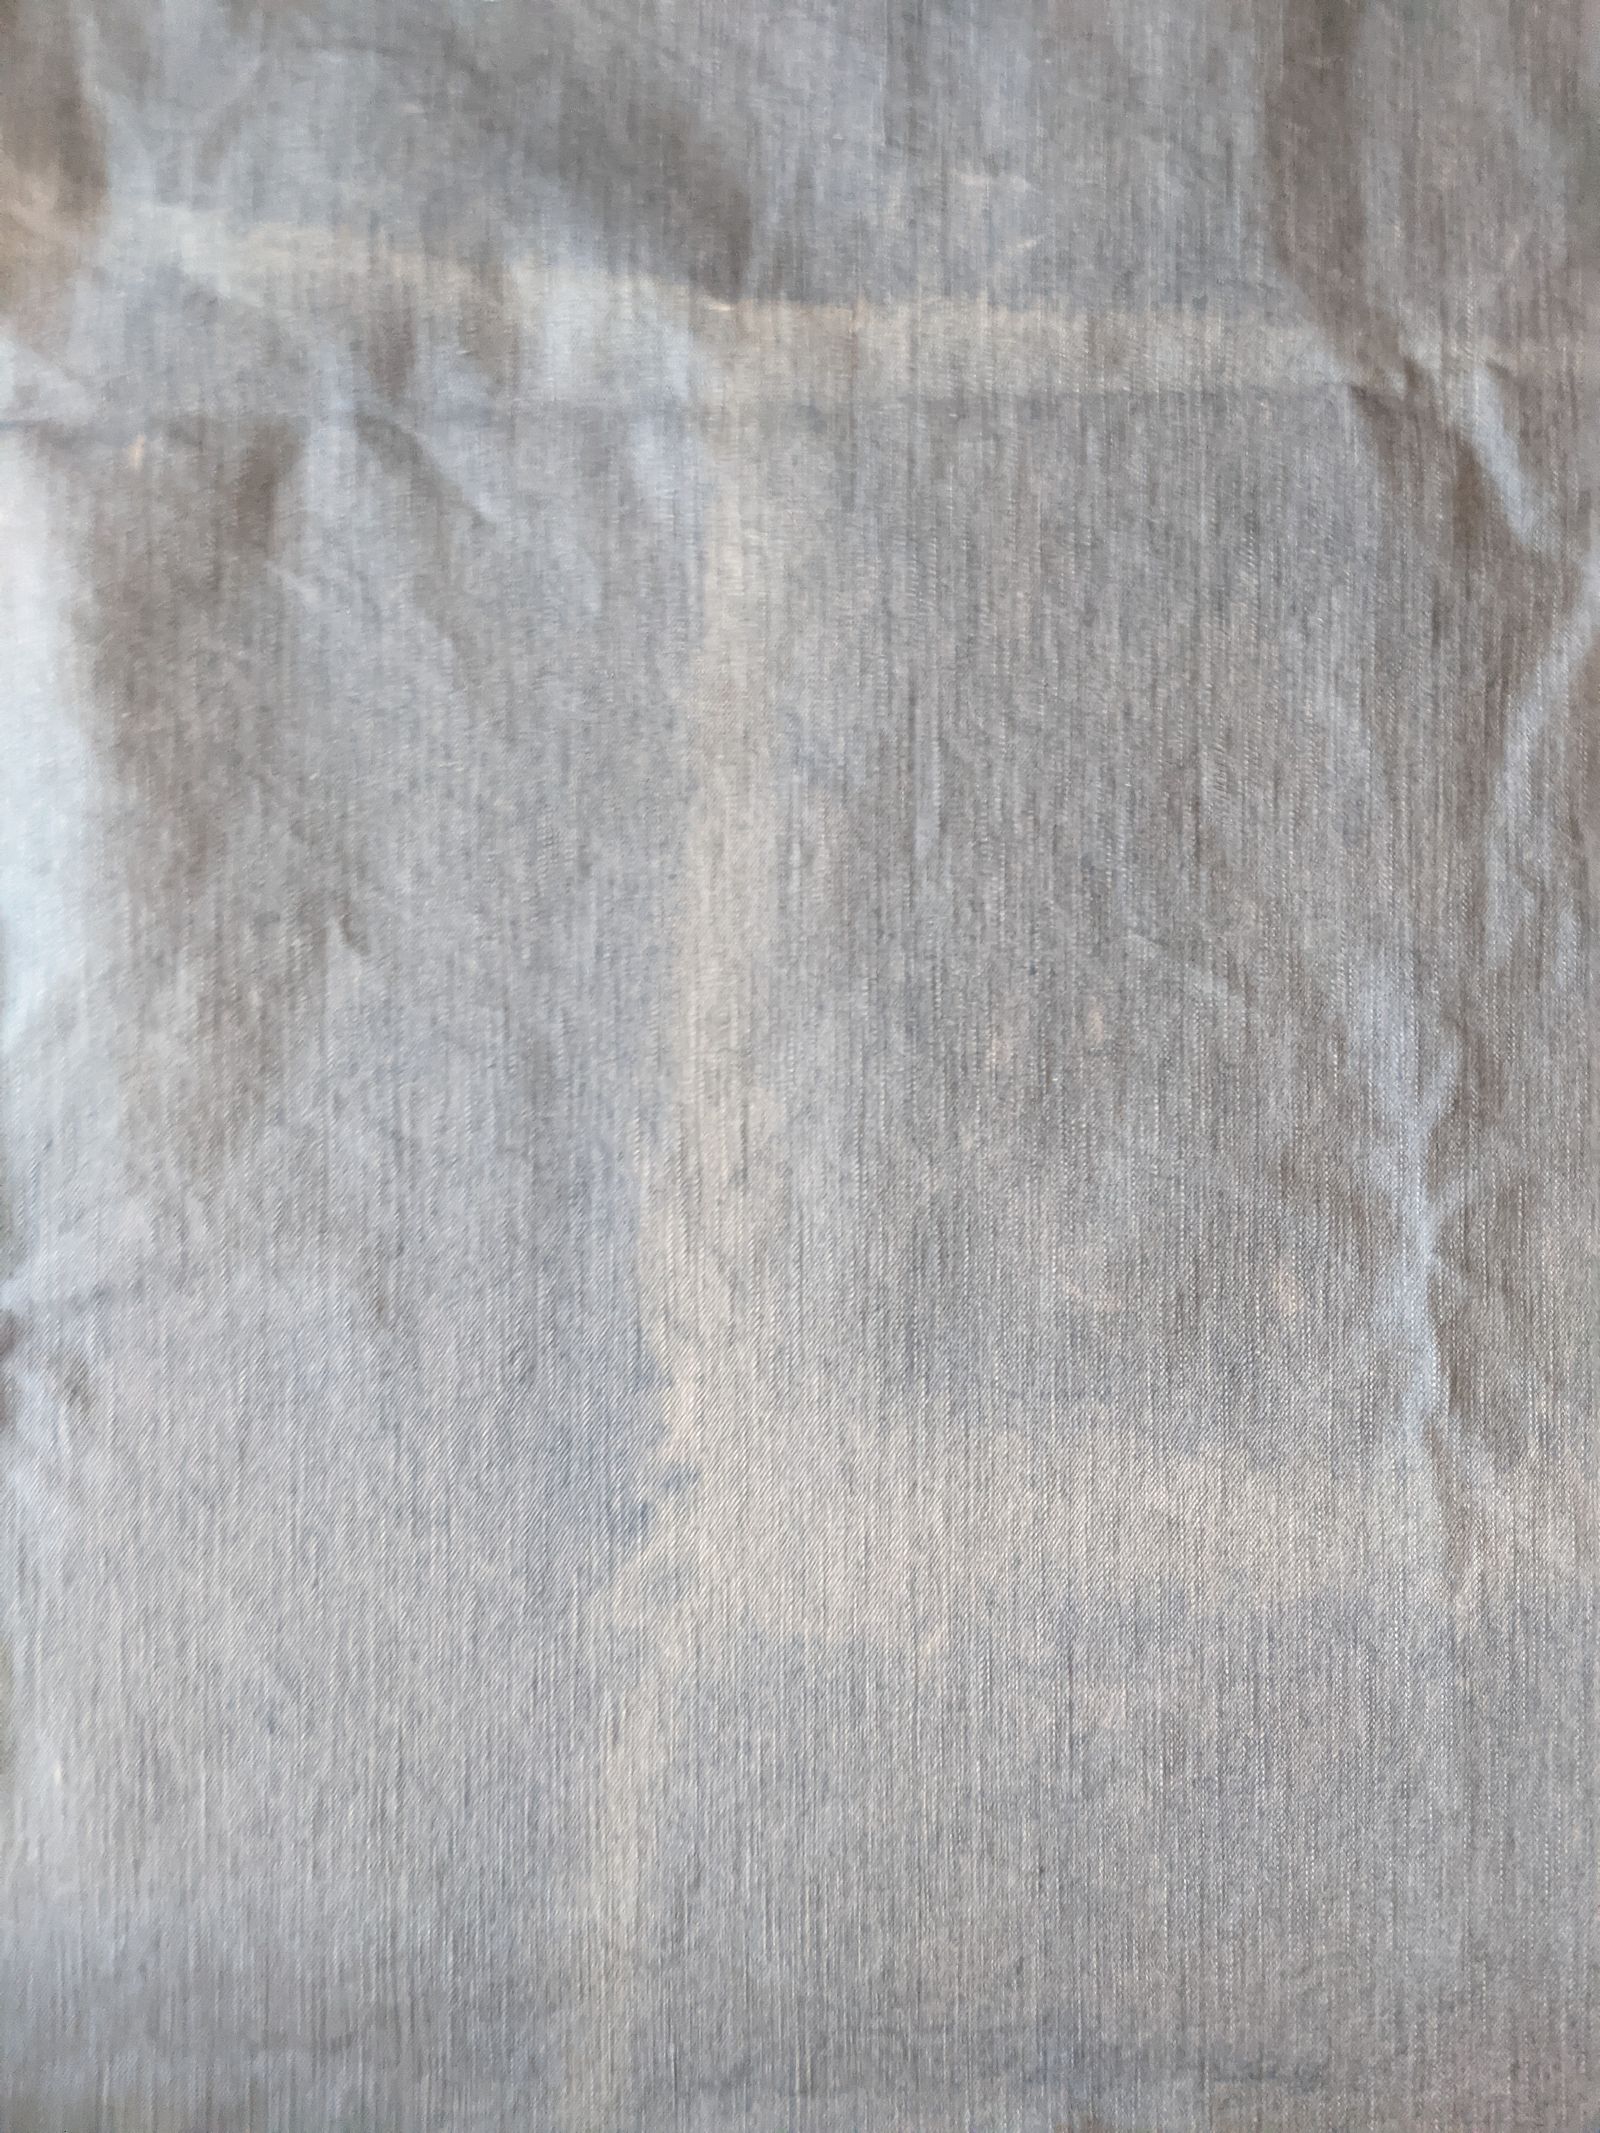
Overall I'm happy with how the bleaching turned out. Here's a before and after. I have an identical cut that wasn't bleached so it's a side by side. (Plus a bonus swatch that was bleached for 1.5 hrs)
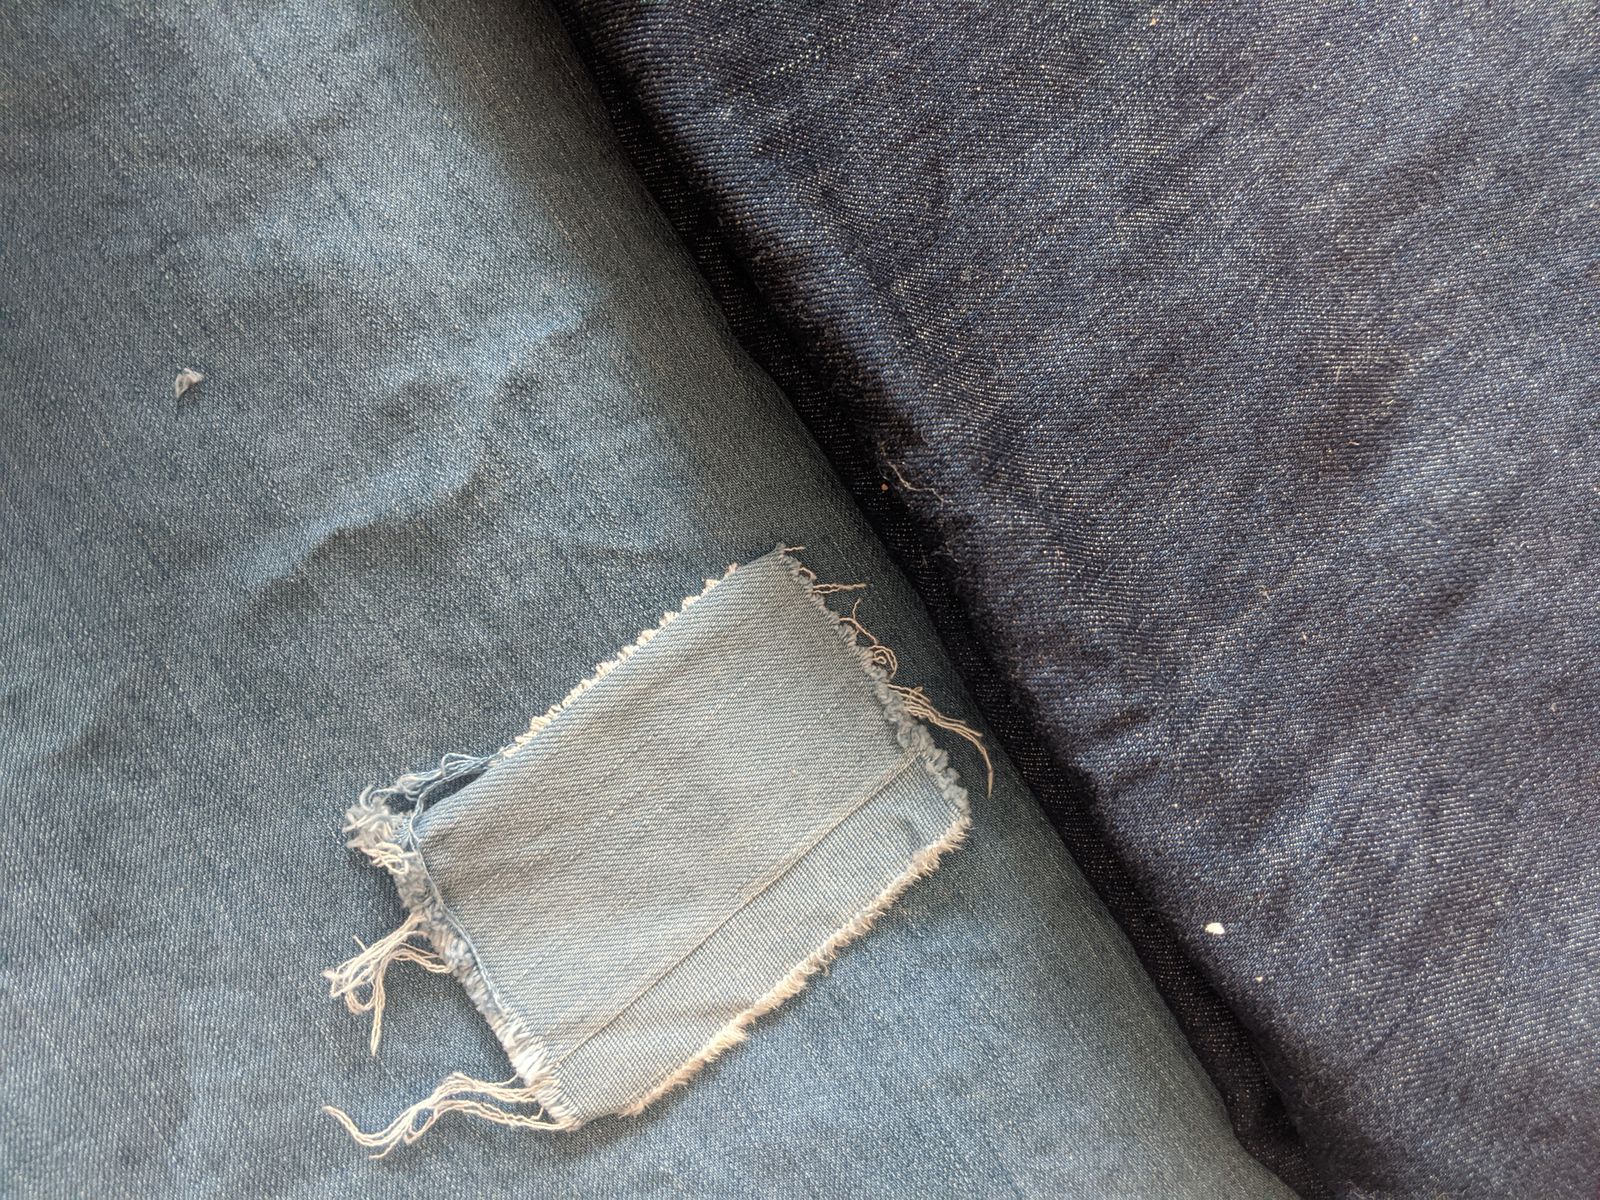
The way this particular denim fades/bleached is not my favorite. The undertones/color quality is a little more "cheap" than I'd like, but there's nothing that can really be done about that other than picking an entirely different denim. Or waiting for it to look distressed.
There is a little unevenness of bleaching. It doesn't bother me, I can either avoid those areas when cutting or just embrace it as part of a distressed look. If I was being extra picky I would have made a bigger bleach bath to give the fabric more room to spread out, and would have agitated it more.