
Blanca Flight Suit


Wearing this Blanca Flight Suit feels like wearing the definition of sewing — a "We Can Do It" attitude, precision inspiring details, and the emotional rollercoaster of fitting pants and a shirt at the same time. I finished this up in early June and it's seen steady wear and a few good break-in washes the past couple months.
It was totally worth the pain-in-the-butt two weeks I spent puttering away on muslining and adjusting. Blah, but worth it!! Worth it!! Make a muslin. Or 5.
This is a long list of adjustments but don't let it deter you from making a Blanca for yourself! I often fall on the more nit-picky side when fitting and enjoy the process. You likely will not need to make this many tweaks!
MATERIALS
Fabric: Blackbird Fabrics 10.25oz Italian Non-Stretch Denim - Medium Indigo (out of stock now). A perfect weight for this pattern! Sturdy enough for pants, but comfortable enough for the top as well.
Thread: Gutermann Topstitching, #448 (classic jean brown)
Zipper: Wawak
Buckle: Closet Core Patterns Blanca Hardware Kit
NOTES
I didn't shorten the bodice
Which surprised me! The waist seam is designed to sit ~1" below the natural waist. To achieve that on my shorter torso, I tested shortening the bodice by 1/2"-3/4". Ended up returning to the original length because it actually worked just fine. The waist seam maybe sits a little lower on me than designed, but I think it looks and feels good.
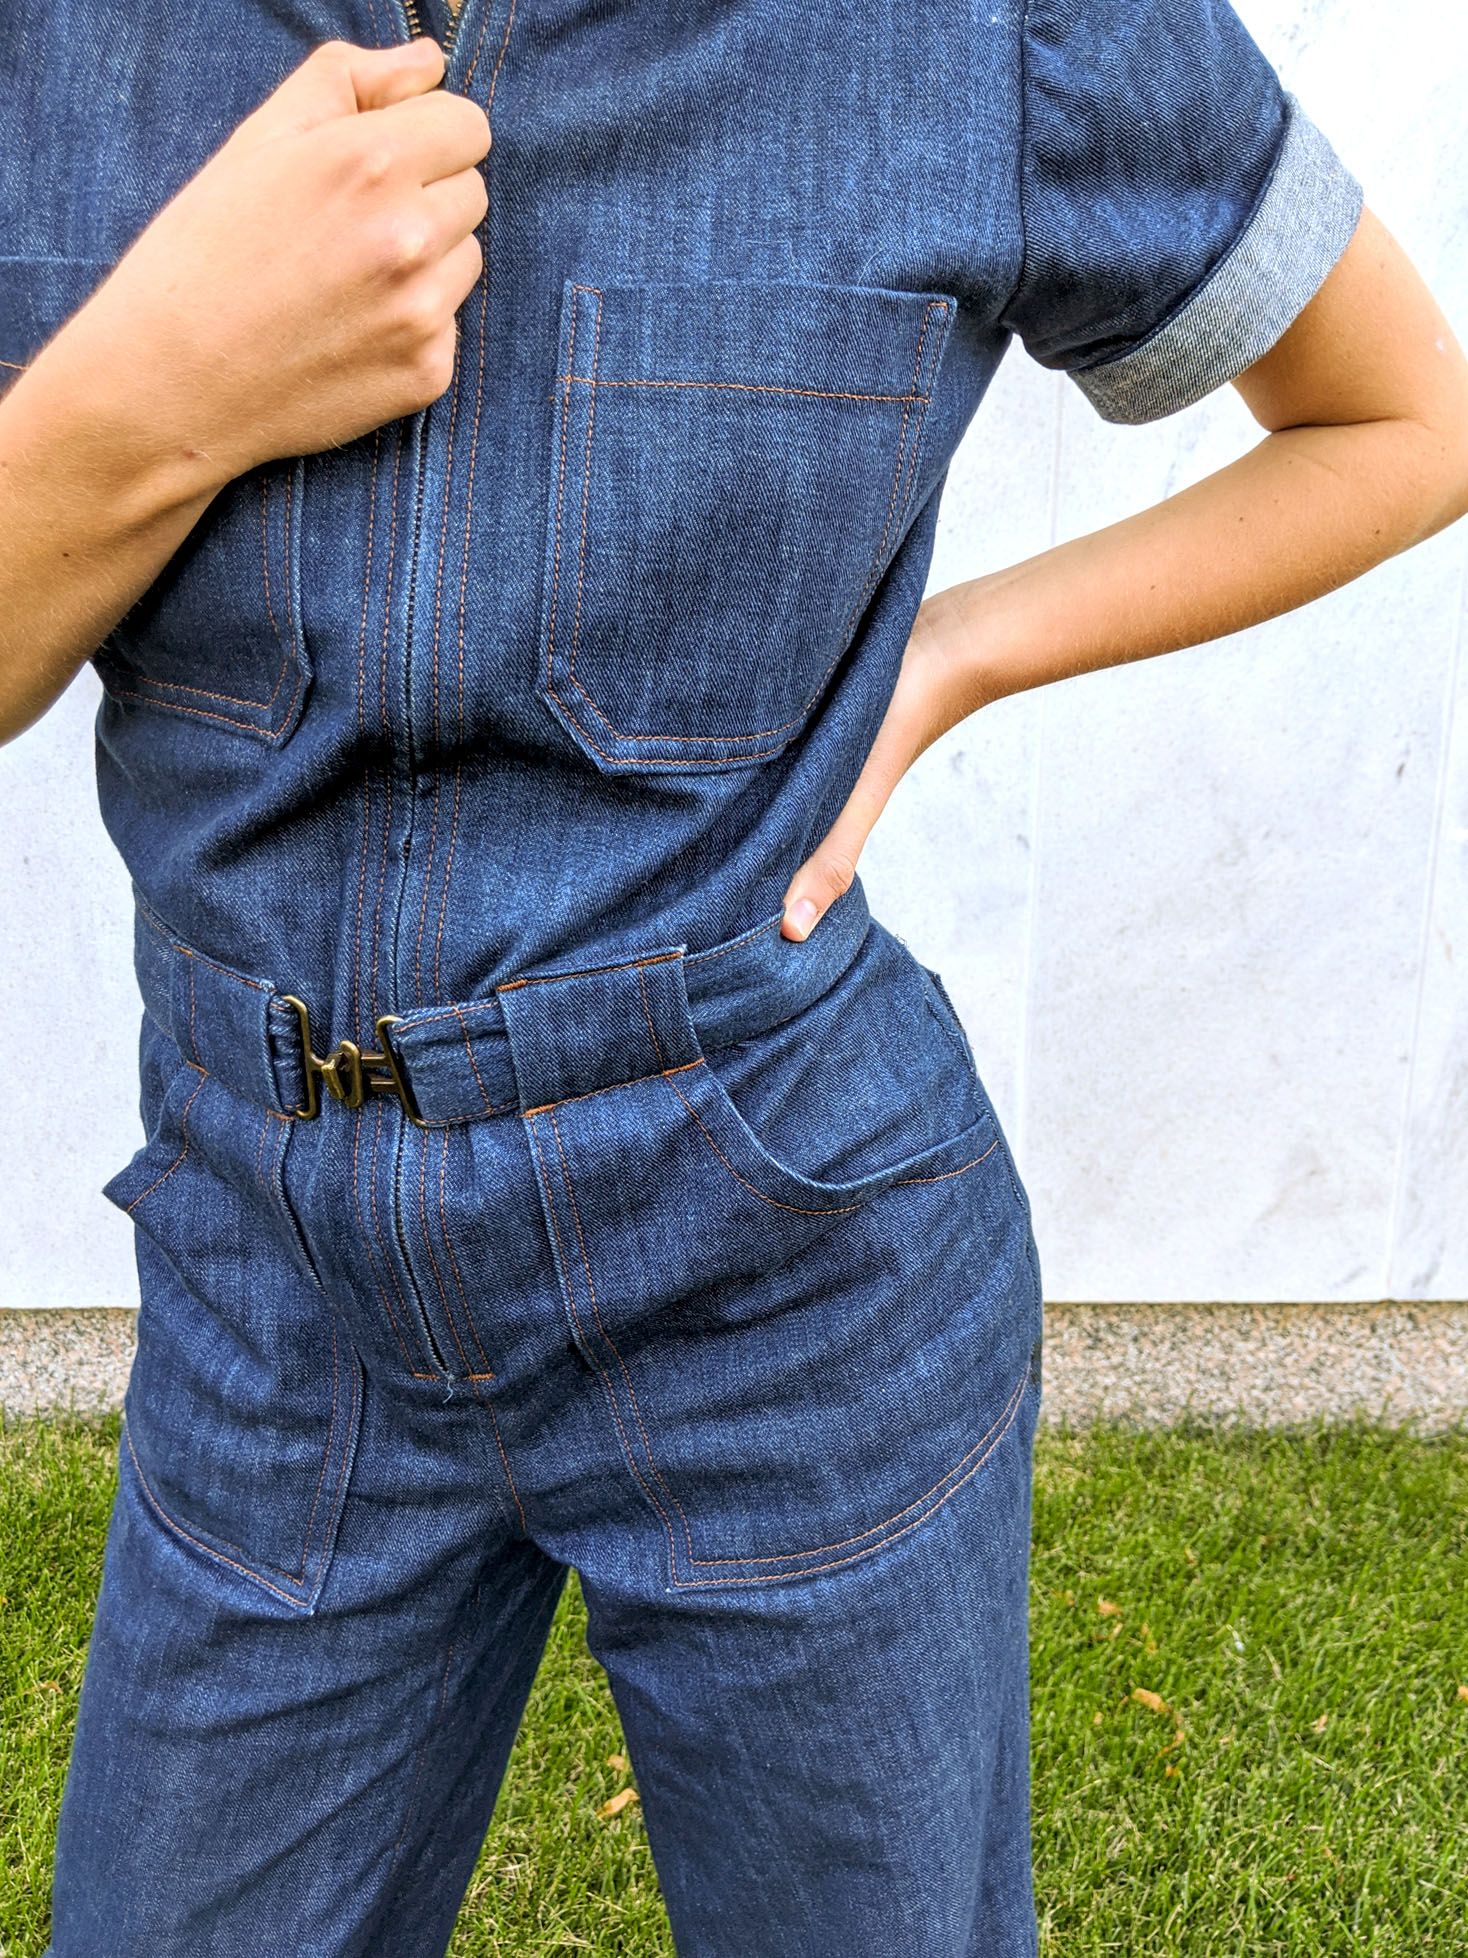
Belt
I felt a bit duped by the belt instructions. The standard instructions provided with the pattern lead you right in to the non-adjustable belt without discussing the option to do an adjustable belt, so I ended up with a non-adjustable one. It does fit nicely but I wish I had more belt tightness option for comfort. (or perhaps should have just been paying more attention to the instructions!!) (adjustable belt instructions available in the Blanca Sew Along)
ADJUSTMENTS
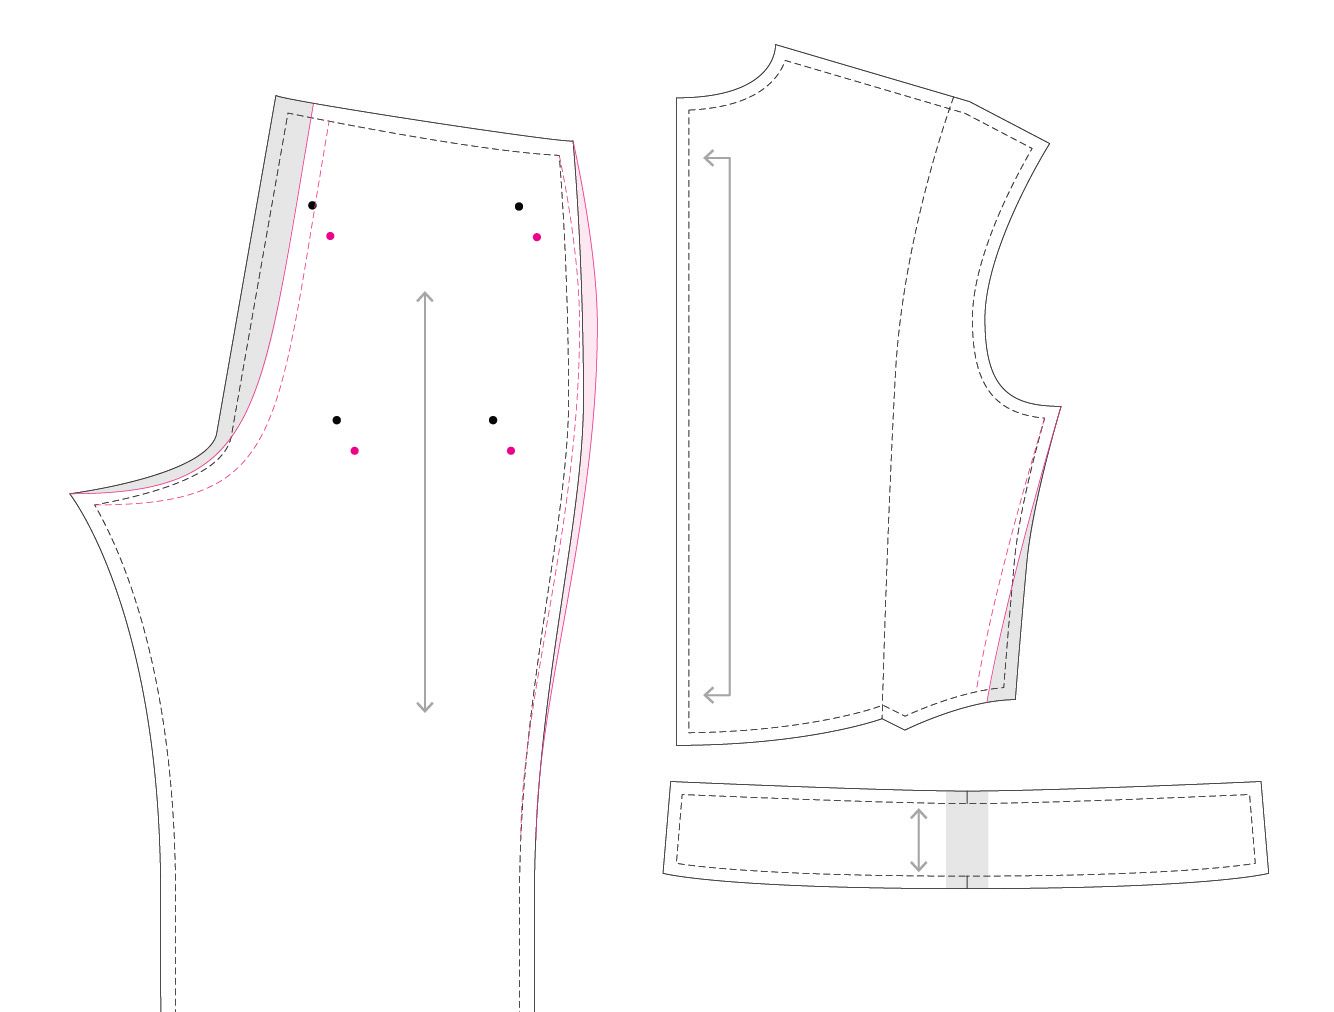
In the diagrams below
Black Solid Line: Original Cut Line
Black Dashed Line: Original Seam Line
Magenta Solid Line: New Cut Line
Magenta Dashed Line: New Seam Line
Grey Fill: area removed from pattern
Magenta Fill: area added to pattern
- Grading between a 4-6, special attention to the underarm/side seam.
- Raised Armhole
- Narrow shoulder Adjustment: 1/2"
- Sleeve: Adjusting draft of cap to fit new armhole
- Back Pleats: Move toward center by 1/2"
- Back Pleats: Double Topstitched
- Front Crotch: Flat front and curve smoothing
- Back Crotch: Angled down and scooped out
- Back Crotch: Shortened length seam (because of #7)
- Back Pockets: Moved down (again because of #7)
- Back Waistband: Took 2" out of the center
- Back Bodice: Took 1" from the side seam (for 2" total)
- Legs: Shortened by 2"
Grading between 4-6
This is common for me with Closet Core — I'm usually a 6 bust, 4 wasit, 6 hip. On this pattern it was also important in the underarm area, I'm guessing since there is no dart. It took some tweaking between sizes 4-6 along the whole side seam, on both front and back pieces. If you are struggling to find the right through the side seams I suggest treading the front and back bodice pieces independently at the side seams and "not matching" the sizes on both front and back at every point along the side to give you more control over the fit (for example, perhaps doing a 4 at the underarm point on the back piece and a 6 at the underarm point on the front piece)
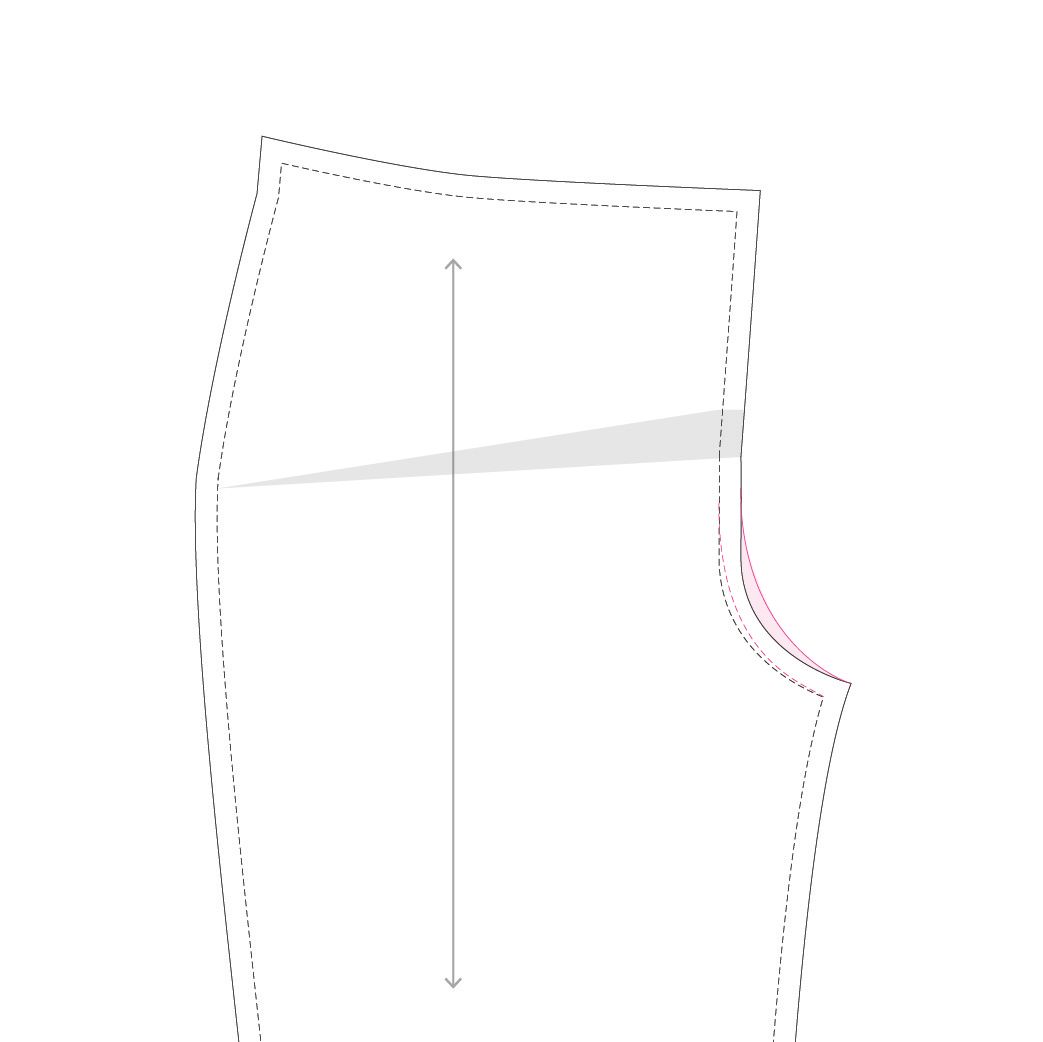
Raise Armhole
The underarm was sitting too far away from my body and was restricting mobility, so I raised the underarm by 1/2".
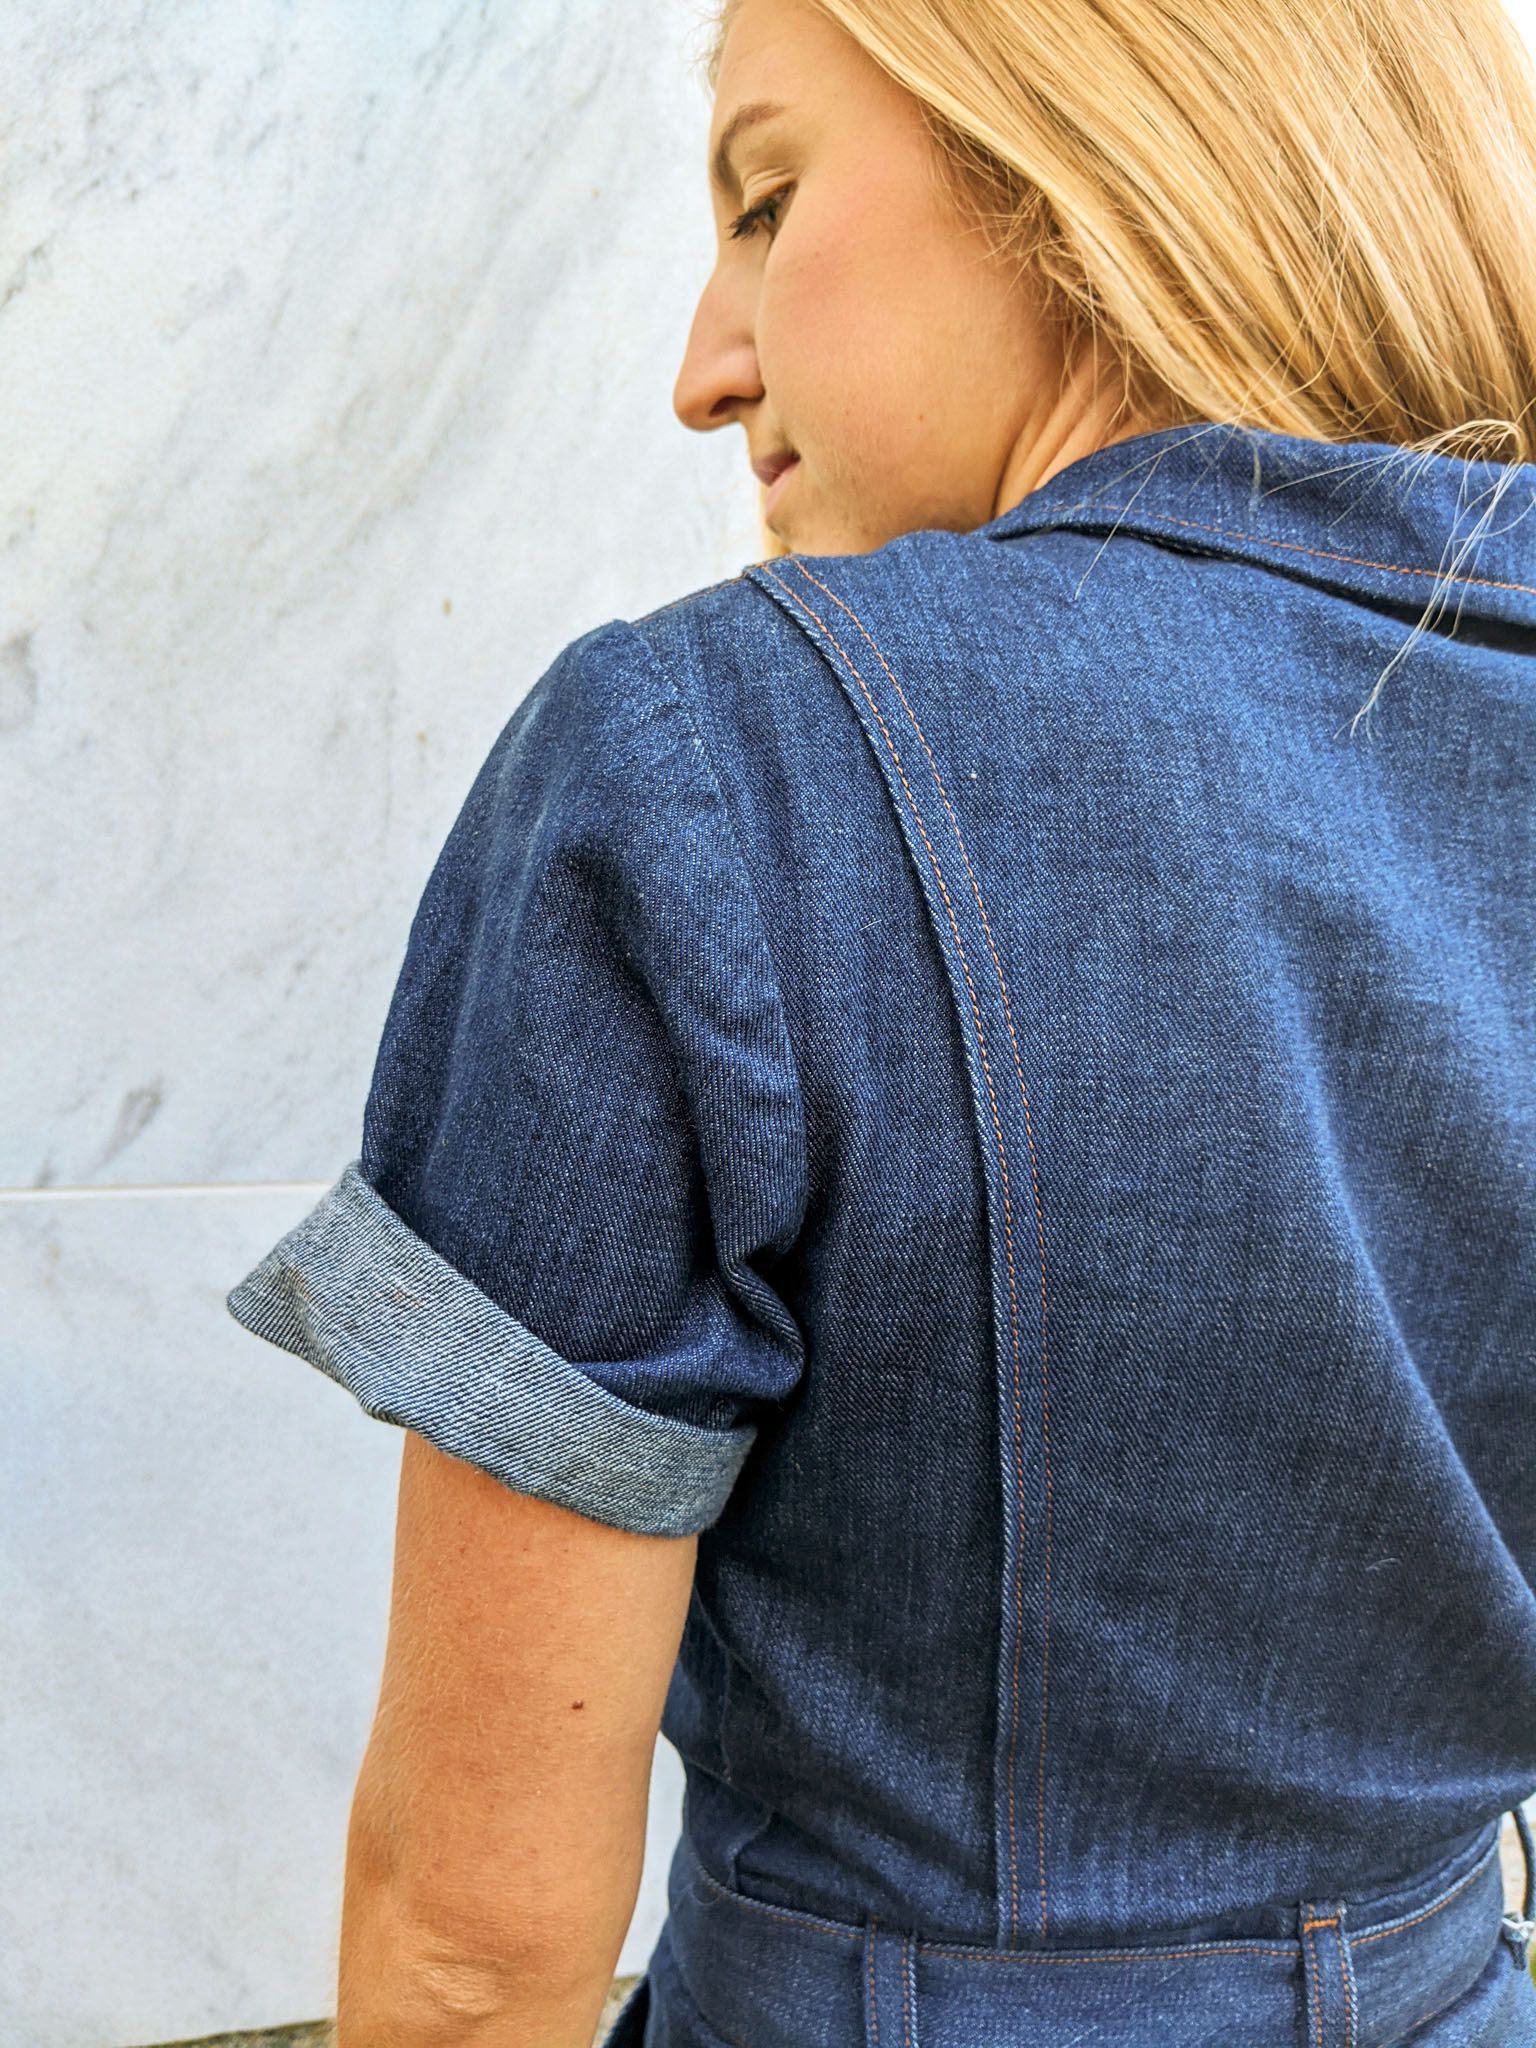
Narrow Shoulder Adjustment: 1/2"
The original shoulder design is meant to be slightly dropped, but was too wide for my shoulder and looked silly. I did a 1/2" narrow shoulder adjustment using this tutorial by Helen's Closet to achieve the designed fit on my body. (CCP also details a shoulder adjustment method in their Blanca fitting post)
Sleeve: Adjusting Draft of Cap
In the Blanca Fitting post, they mention likely not needing to change the shape of the sleeve cap after a narrow shoulder adjustment, which I didn't find to be true. My sleeve had obvious vertical drag lines and it was clear the cap was too short. I needed to add some height to the cap. It took A LOT of sleeve tests to find the right balance between maintaining the relaxed bicep width, fitting the sleeve cap height, and maintaining the right amount of ease in the sleeve cap.
If you're having similar issues, here's a post to reference by In House Patterns. I didn't follow this tutorial/method exactly, but it's got good visuals to help you think about the relationship between bicep width and cap height.
Back Pleats:
After taking the shoulder in, I opted to move the back pleats 1/2" toward the CB as well. Closet Core's fitting post details this adjustment too.
Back Pleats: Double Topstitched
The only design detail I don't like about the Blanca is the single line of topstitching called for on the back pleats. I understand it (the extra fabric in the pleat provides room for movement) but I just don't like the look of it teetering on the edge and looking "flippy." I found I could get away with doing two lines of topstitching to match the other double topstitching lines on the garment. This impacts arm mobility since it decreases the amount of ease across your back. If you like the look of double topstitching, I recommend testing it on your muslin to have the opportunity to fix any loss of mobility. (You could also maybe "cheat" the look by sewing the line of topstitching closest to the CB through just one layer of fabric, leaving the folded under pleat free.)

Front Crotch: Flat Front and Curve Smoothing
This is a common set of adjustments for me on Closet Core Patterns: Smoothing out the front crotch curve and doing a small flat front adjustment. In as-drafted Closet Core pants, I often have an excess of fabric (the kind that pools awfully when seated) at the front crotch and front inner thigh. None of the drag line diagnostics ever really seem to be describing the actual problems I feel I'm having but I've found that flat front adjustments help get a little extra fabric out of the way.
For a flat front adjustment, see CCP's Full Tummy adjustment here. Instead of swinging open to add space, overlap the pieces to remove some fabric here.
Back Crotch
This is a pretty standard set of adjustments for me with multiple pattern companies: angle the back crotch curve down and scoop some out. I feel like I did *more* of all this to the Blanca that usual — to the point where I felt like I was going to break the drafting! I did add some room to the side seams at the hips to accommodate for all the width I removed from the CB, but would take some back out next time — I have a little extra room in the back leg at the side seam.
Making that back seam a little longer with these adjustments sometimes results in the marked back pocket placement sometimes being too high — just do some basted pocket try-ons to confirm location. I had to move my marked pocket placement down by about 1".
Back Waistband, Back Bodice
Ok so after making the back crotch curve adjustments and getting the pants portion of this pattern to fit, I attached the top/waistband and found that the waistband was incredibly gapey at the center back and was sticking out away from my body. So strange. It felt drastic, but I took 2" out of the waistband at the center back and trued up the length of the back waist seam of the pants to fit the new waistband. Then I took 1" out of each side seam on the back bodice to get that to match. It worked! The waistband sits closer but not too close to my body.
Shortening Legs
I shortened the length of the cropped length legs by 2" at the L/S line. After all that other stuff this easy adjustment felt like cheating.


Thanks for reading! I'm always happy to be nerdy about fit so let me know if you have any questions about these adjustments.